June 2020
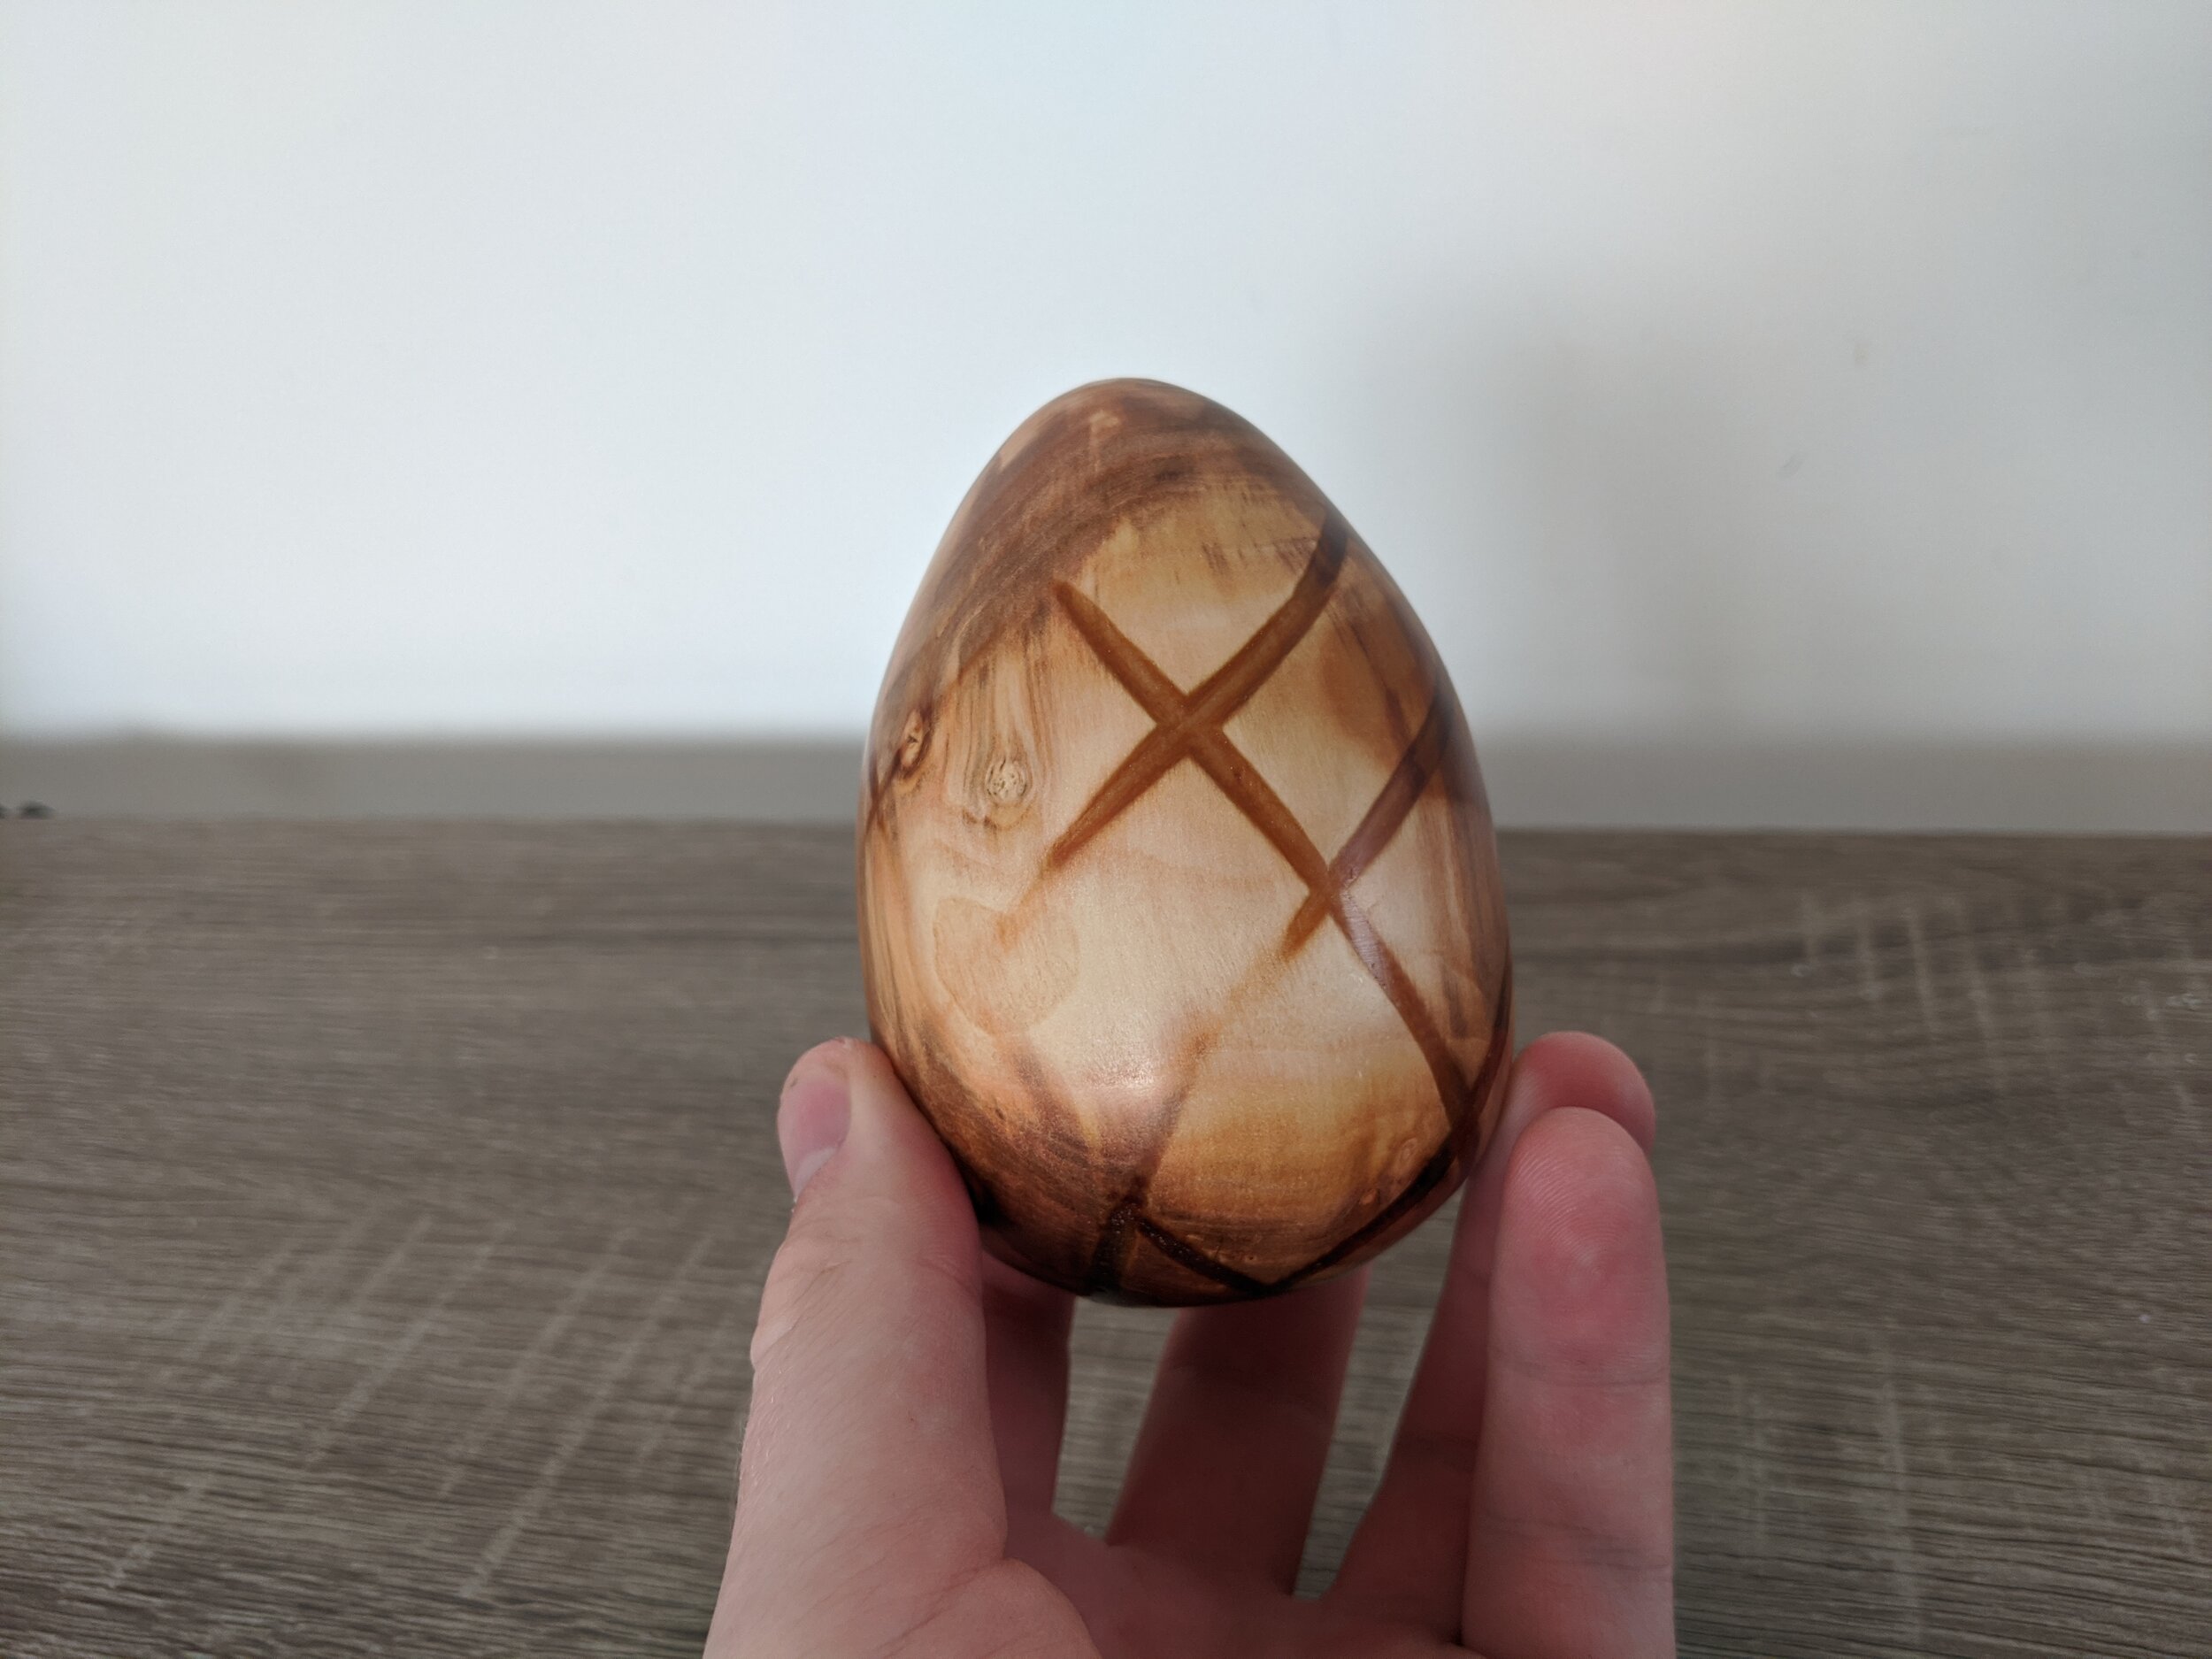


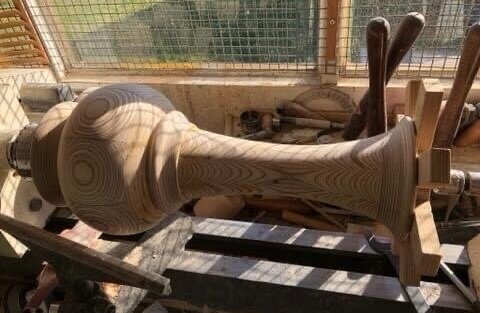
Kyle McGill strikes twice in two weeks. He says he has been inspired by the Diamond Trellis Egg by Faberge, and set off to try re-create the outside of it. He used a piece of green apple which he cut in February, with Glasscast resin. He created the trellis by drawing freehand with pencil, he says that he started with the main trellis, but would have been better by starting at the base and starting a pattern from there. He initially wanted to have the trellis all the way to the top, but has some ‘spontaneous creative decisions’ made with the influence of the tools, which meant he has to redesign the top part of the egg. He says that he will make another one and hollow it, possibly making it larger and thinking of something to add as an internal feature like Mr Faberge did!

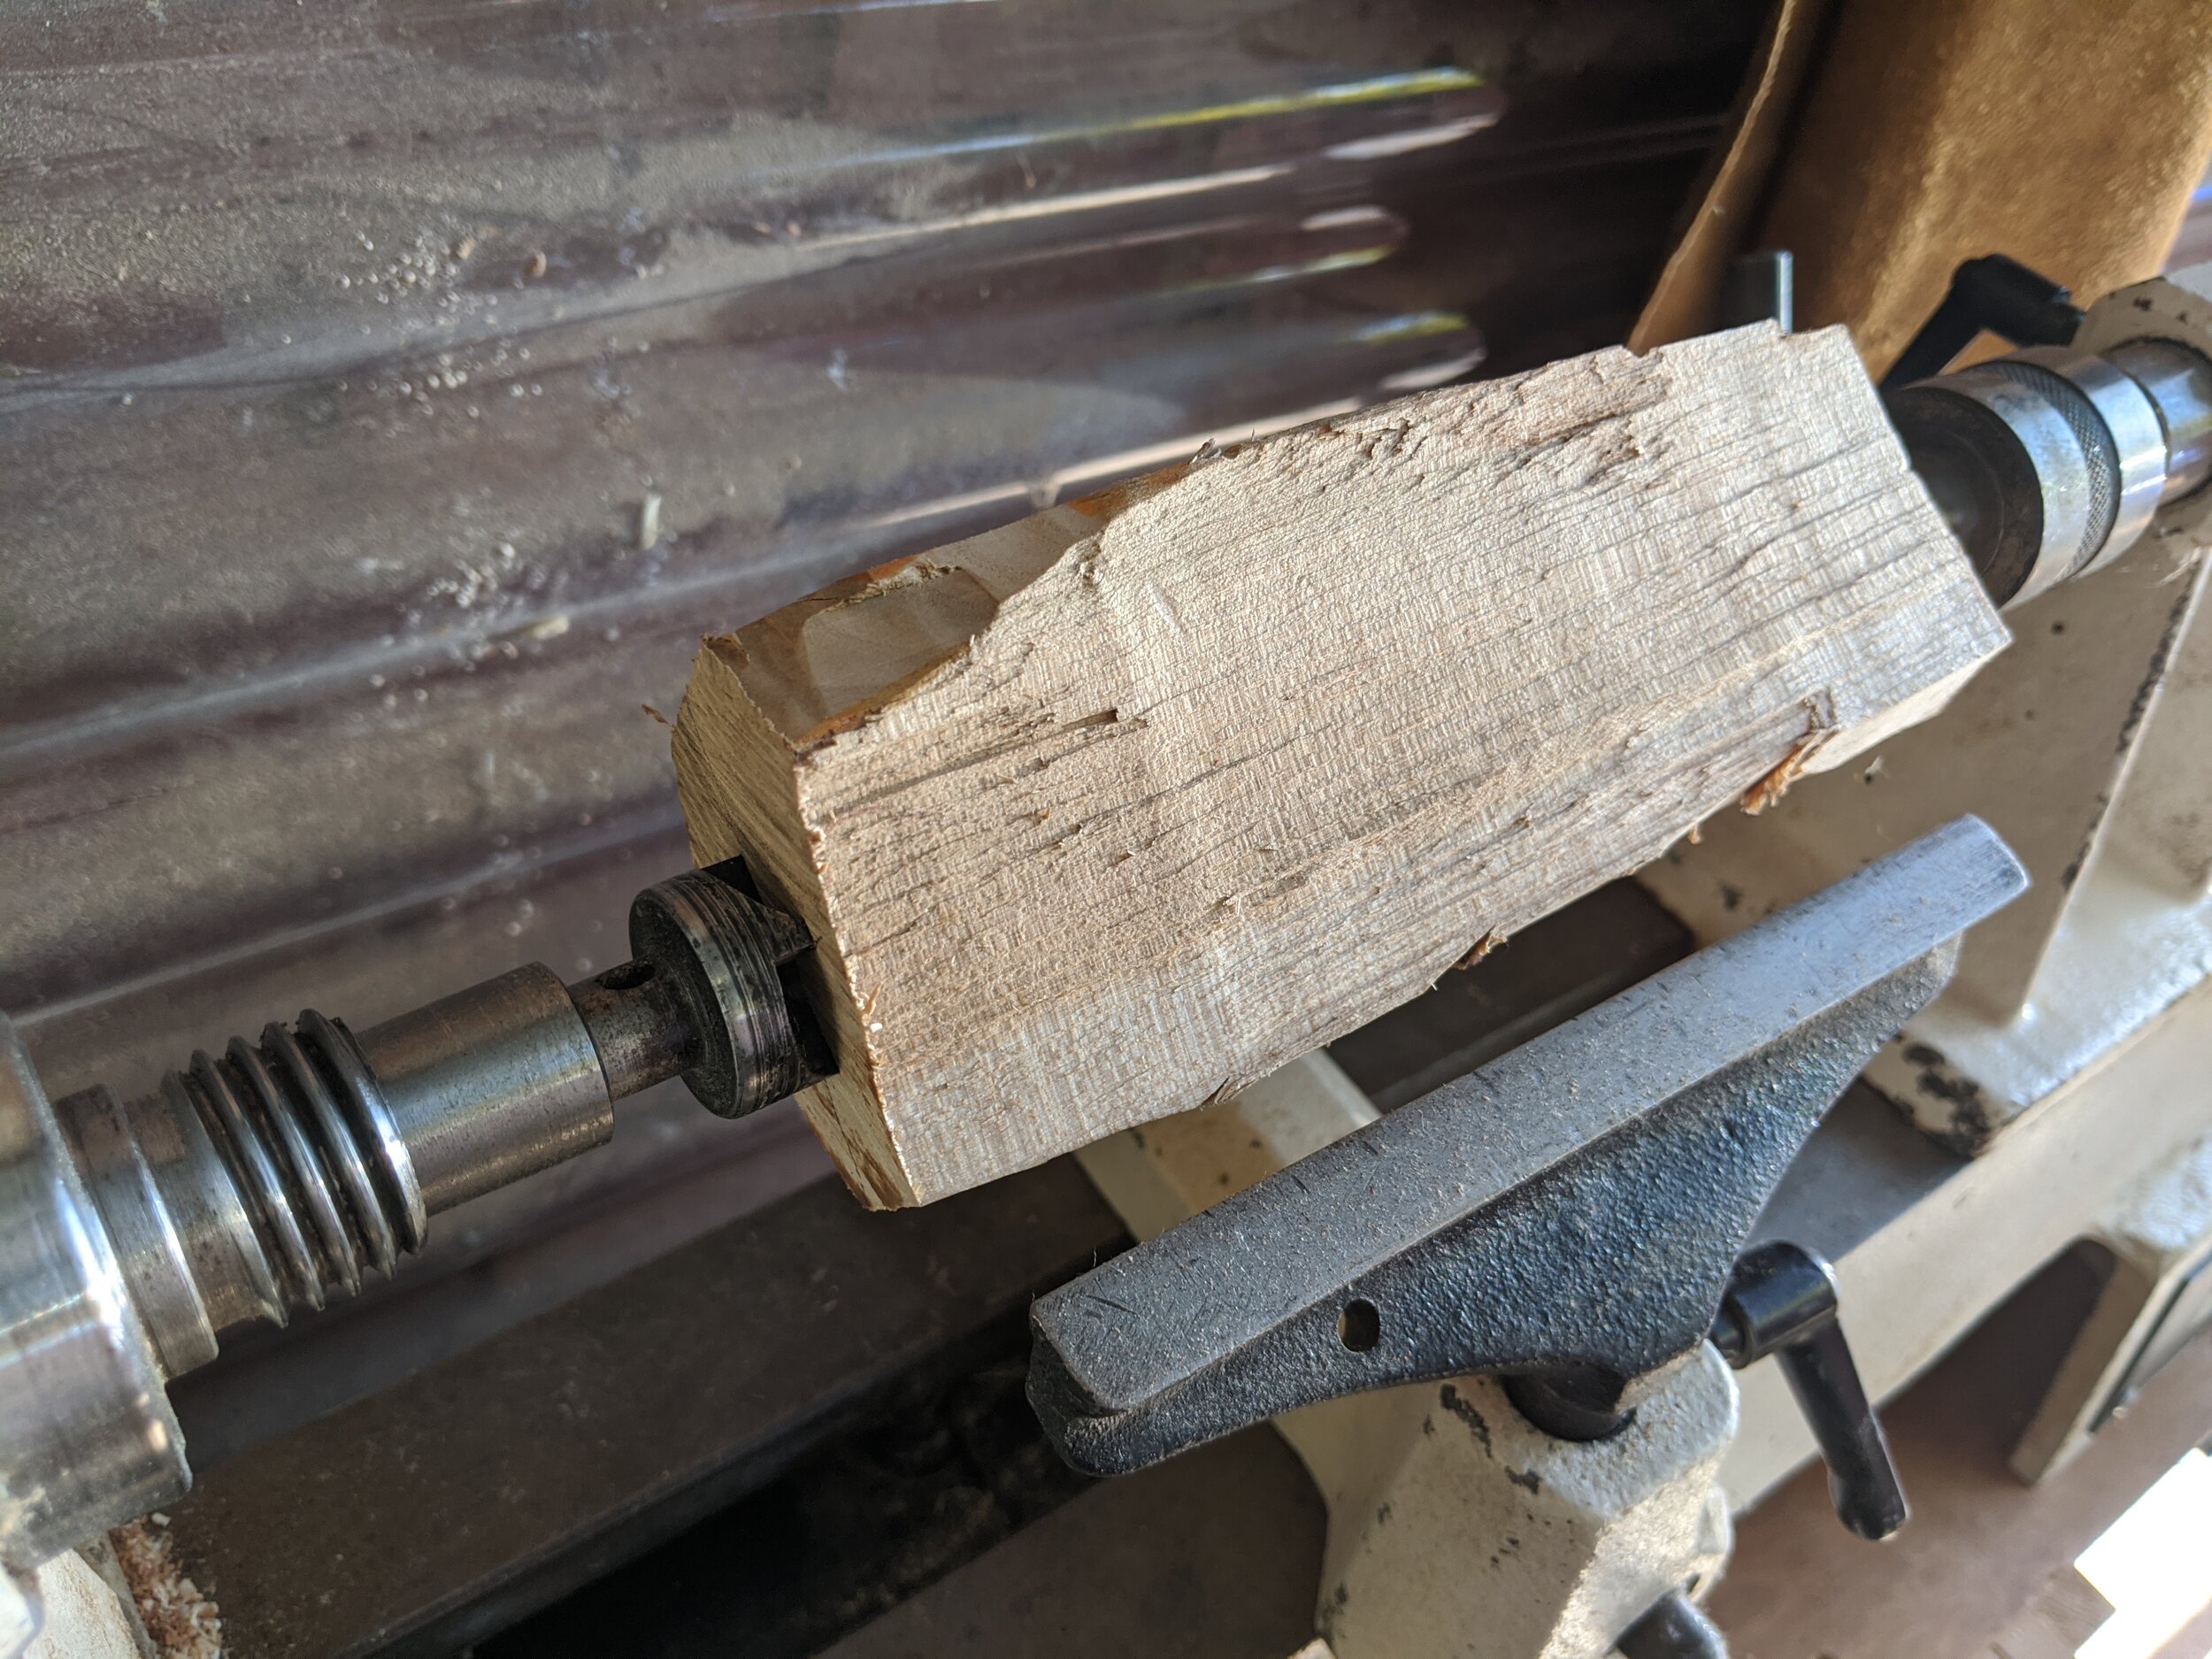

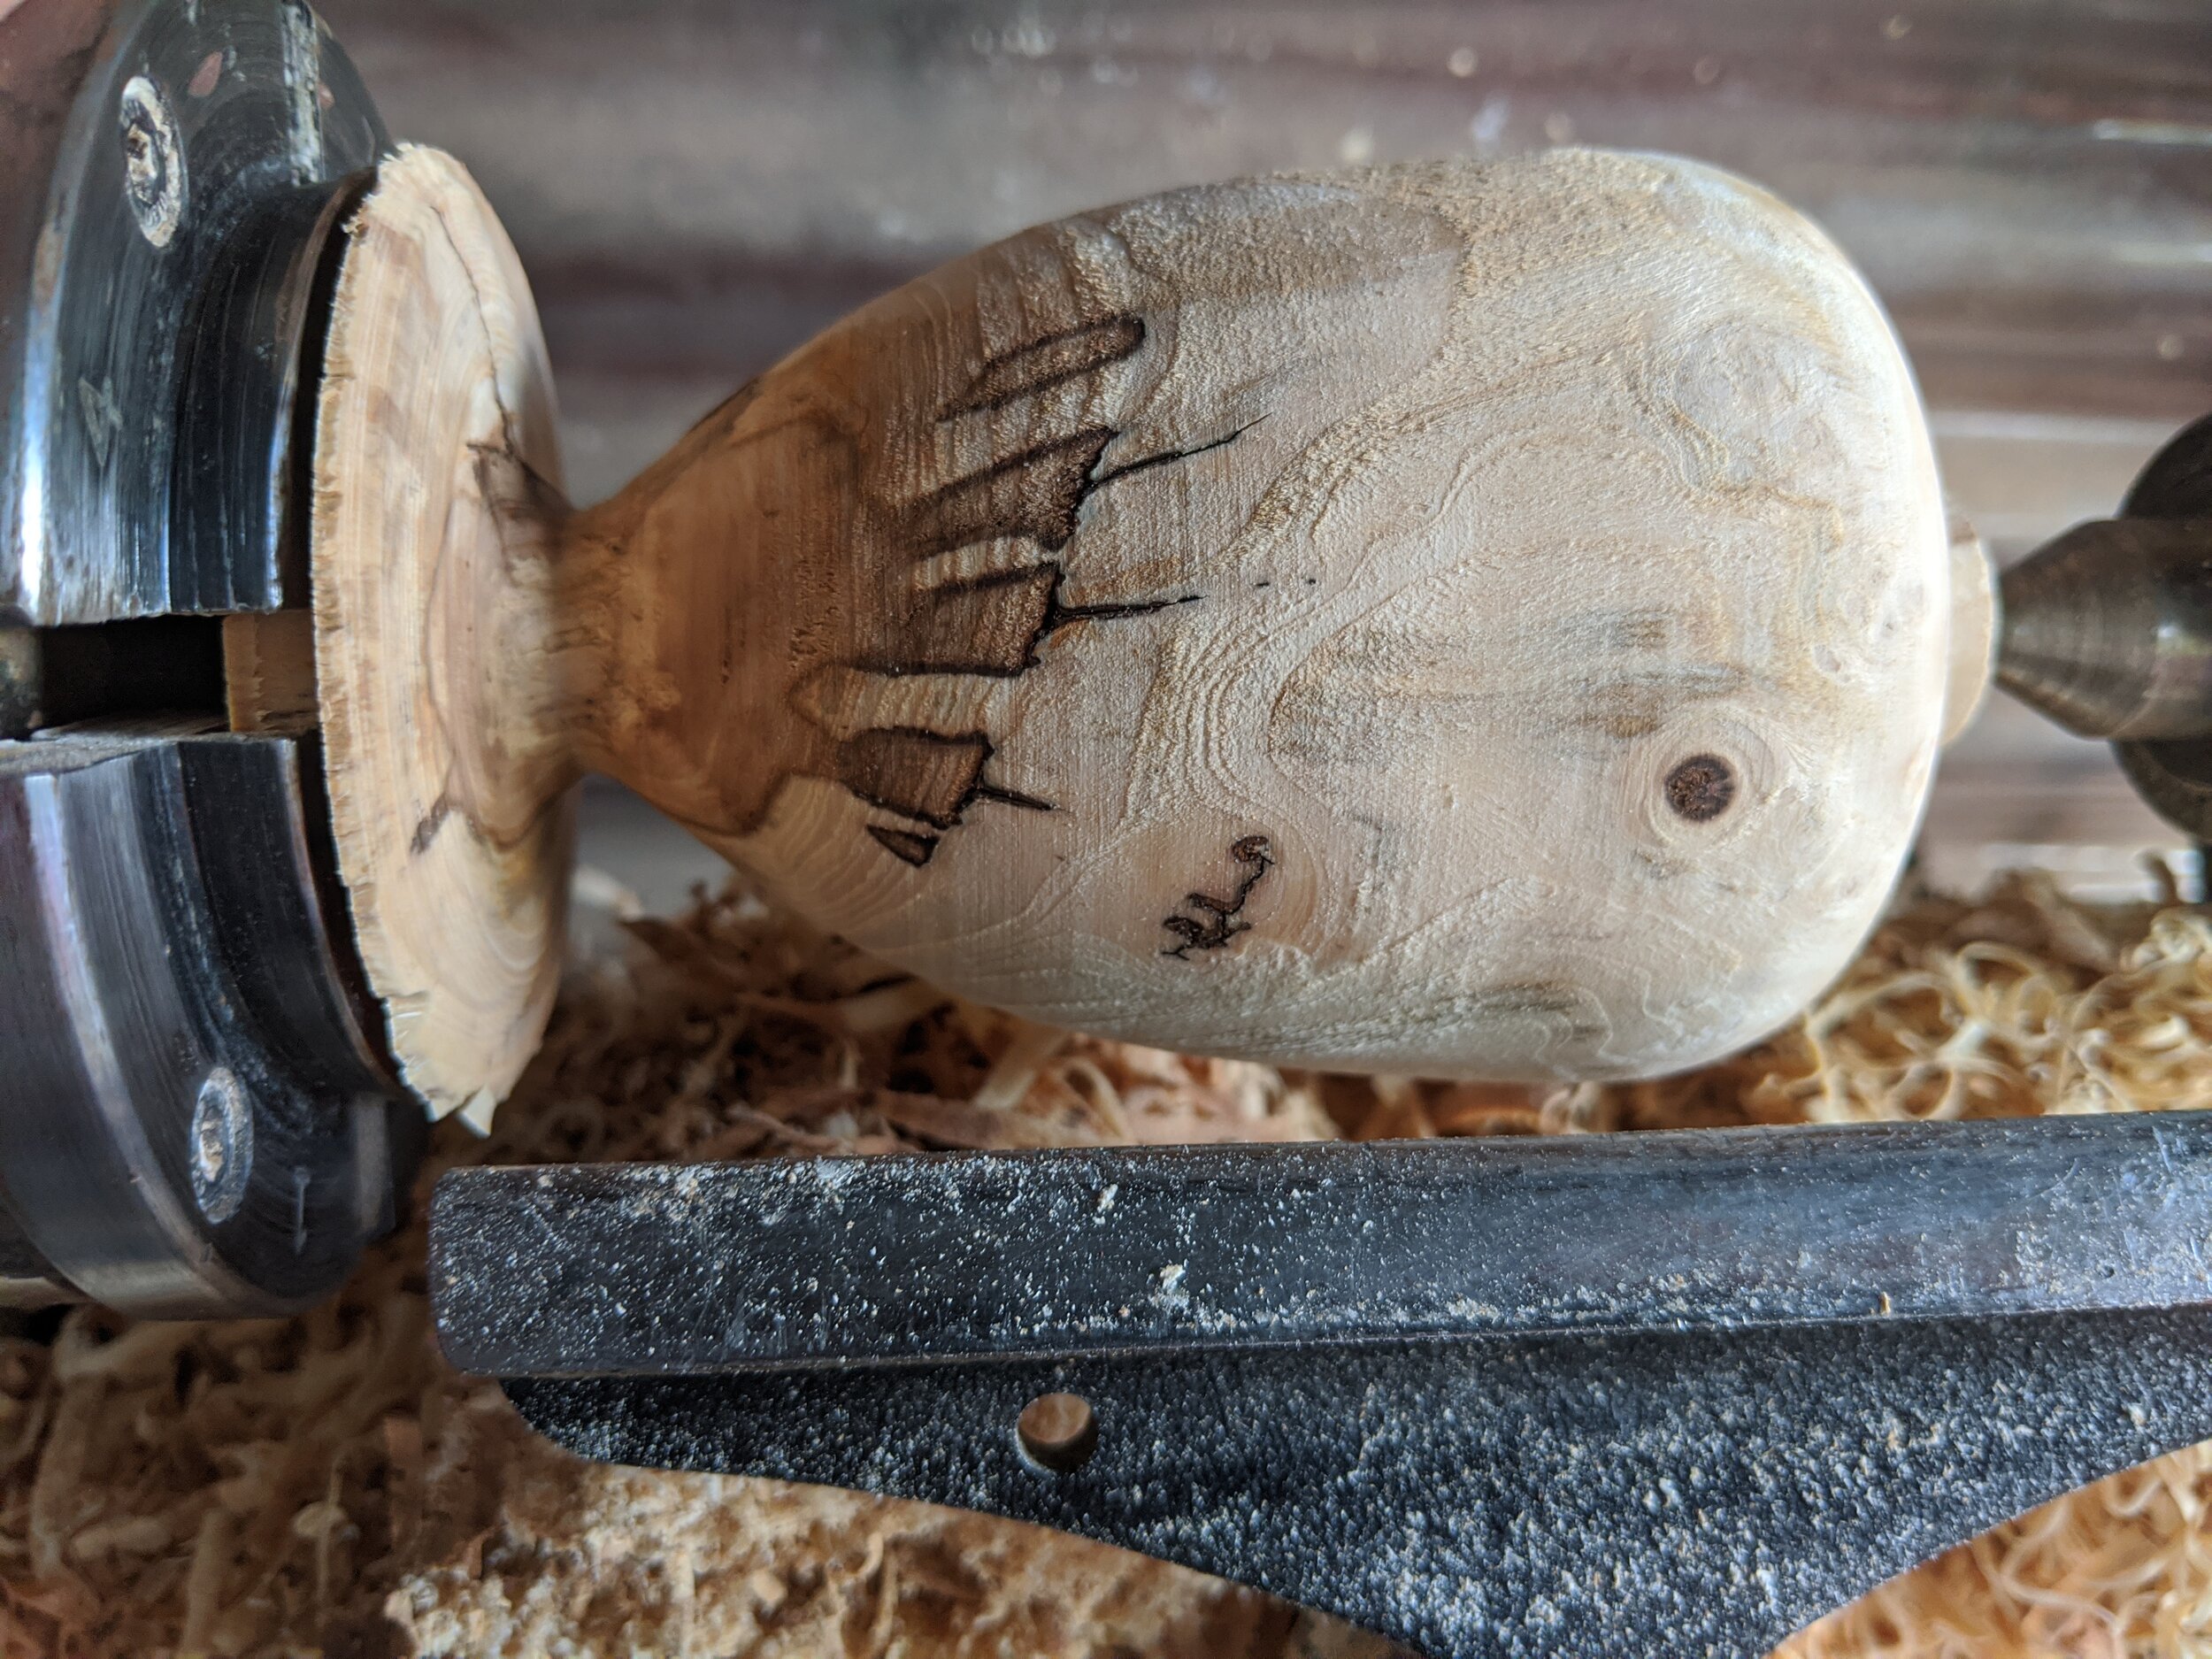
Kyle McGill hasn’t had chance to get over to the workshop during lockdown, but once he could, he thought he’d start with a baby rattle for one of his friend’s newborn. The piece is made from cherry he cut 3 years ago, and as with most fruitwoods, the blank had warped from being green. It was finished with Chesnut’s food safe finish. The captive ring technique was taught to Kyle in January by John Austin, and this is his first piece made using it. He wrapped sandpaper around the shaft after cutting the rings to sand the inside. He says that the beads on the rings could have been more consistent, but he’s sure the 3 month old won’t worry too much about it.


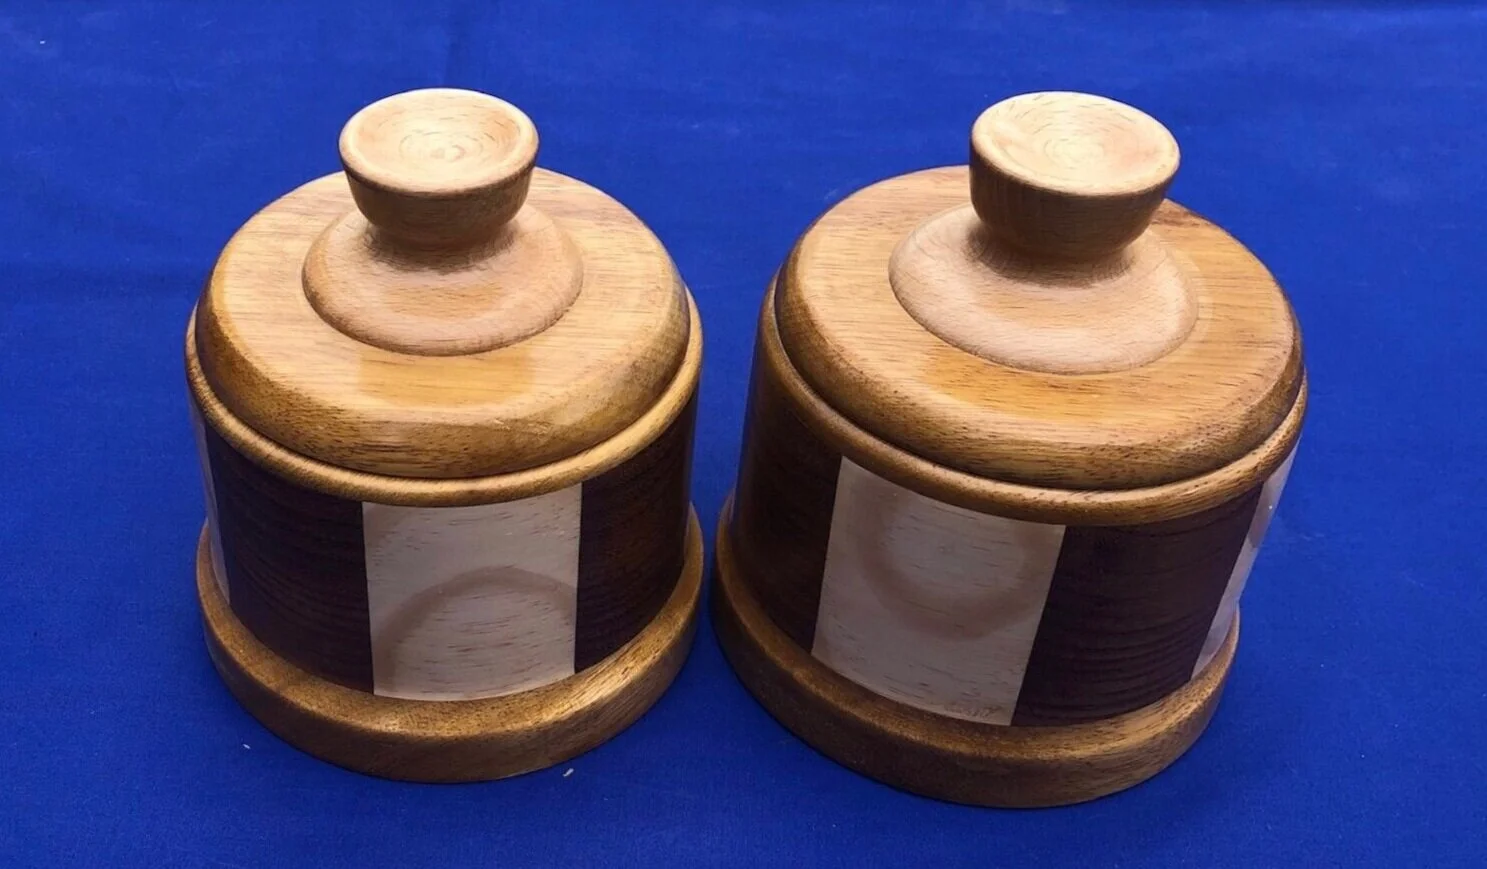
It’s always great to see what you can do with little bits of wood lying around the workshop. Mic Brown has produced these two lovely boxes standing at just over 5 inches diameter and 6 inches tall and made from iroko, beech, pine and one other unknown wood. He says they're not exactly a pair but close enough for me. Iroko is also known as African teak, although it is unrelated.


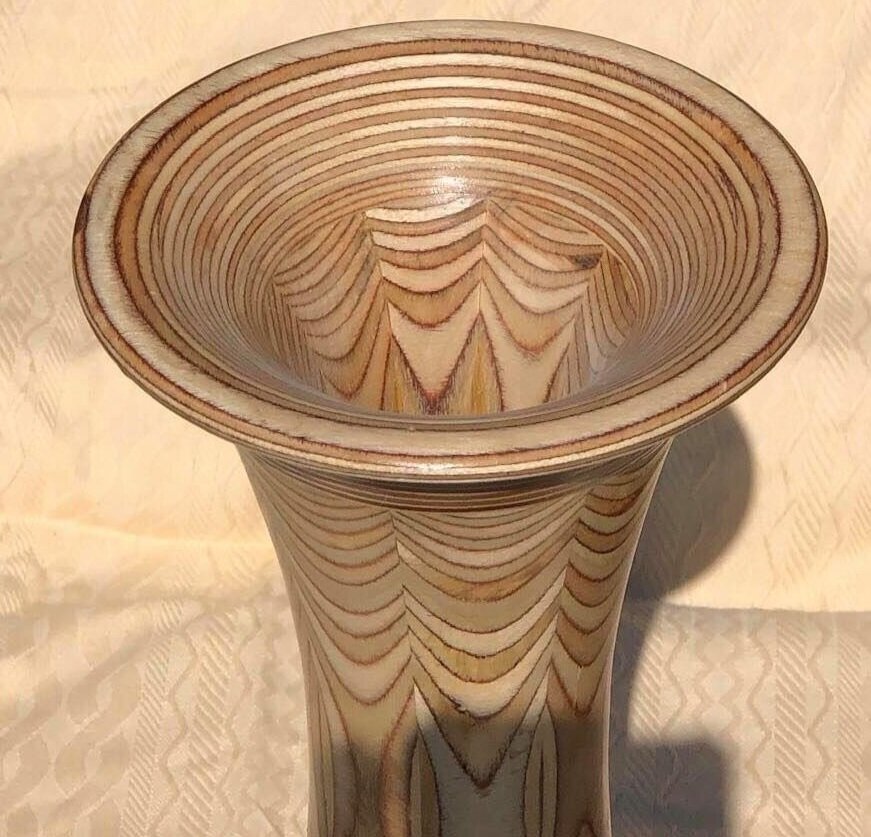

Five years ago, after he made his first plywood vase, Mic Brown said said ‘never again!’.
This is due the time involved in creating a plywood vase. But as he has had plenty of time with this Lockdown he thought why not.
As you can see, his patience has most certainly paid off.
Mic says that this one is bigger than the first one he made. The above vase stands at 19 inches tall and 9 inches diameter. He notes that when segmenting with plywood, you really have to think about the plywood matching because the veneer may not be the same thickness so would look wrong. Also, your tools get blunt very quickly, so a lot of resharpening, due the mixed grain and glue used on the veneer
May 2020
Our very own chairman, Barry Tucker-Vincent, has been busy. He says;
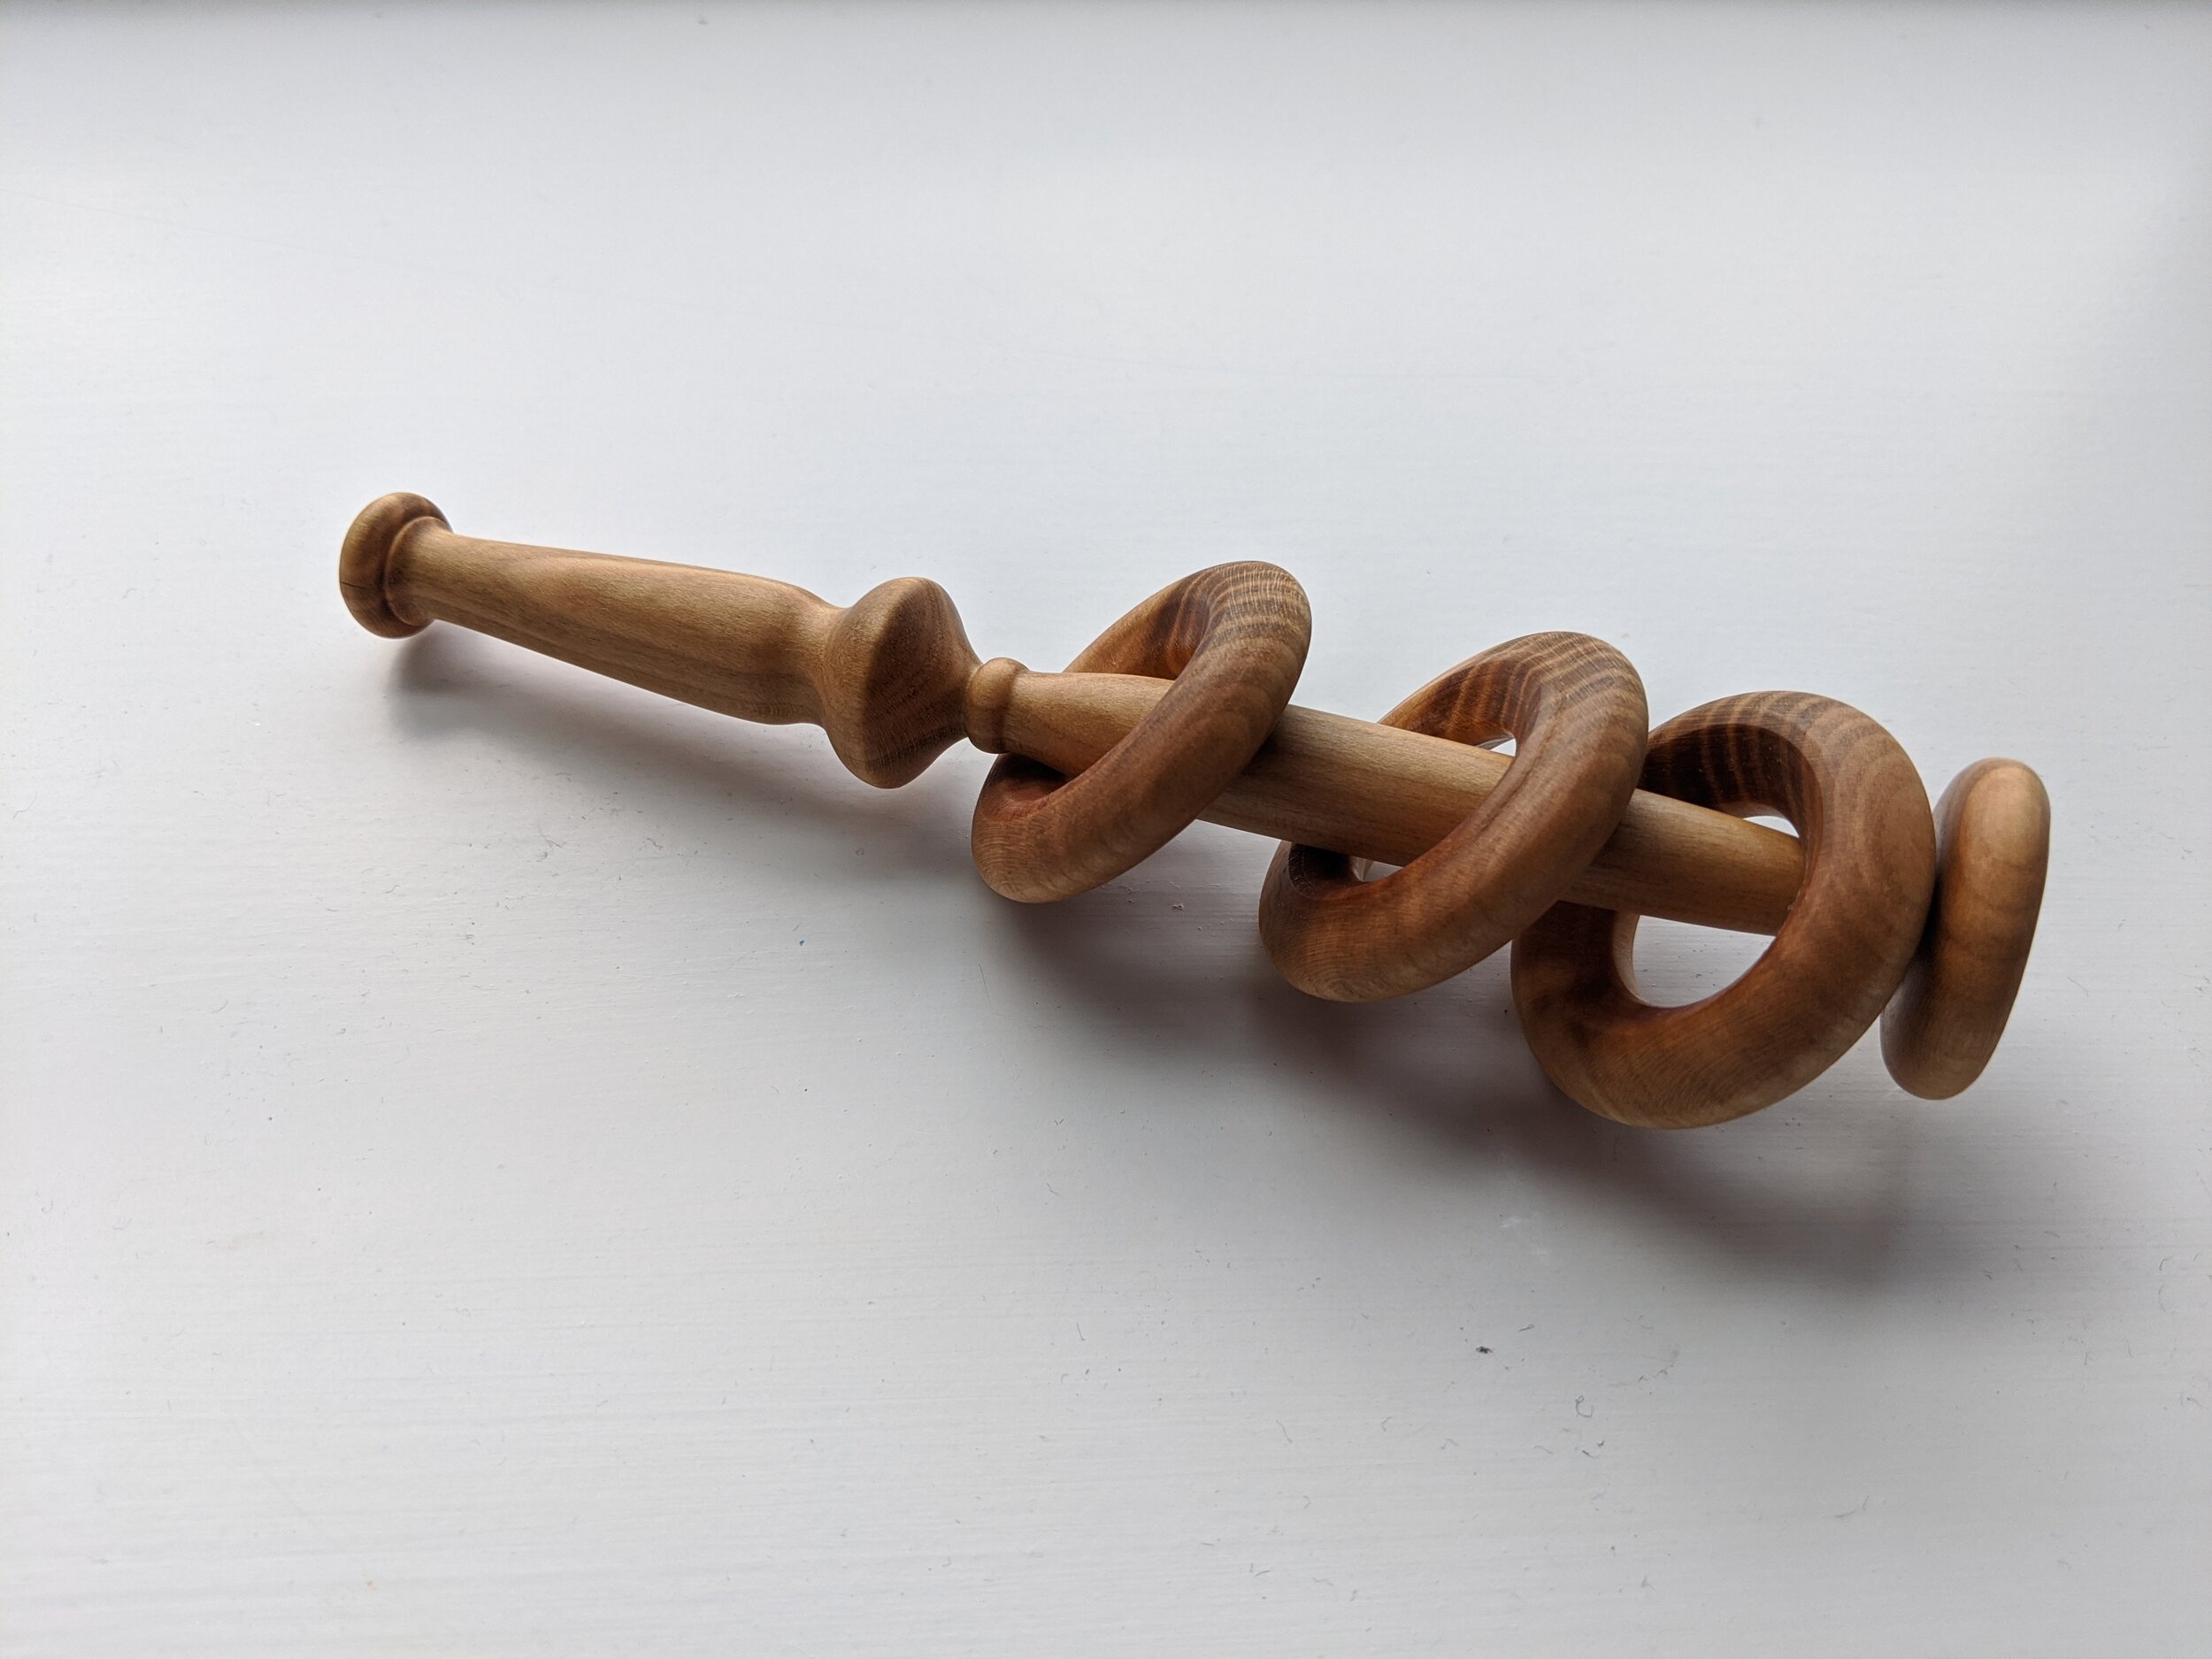
I made the larger clapper/rattle from a drawing, courtesy of Paul Howard, for use on Thursday evenings. Great success but my neighbours daughters insisted I make one each for them and who am I to refuse. I made two smaller clappers to scale. All three are made using Ash with a small amount of Oak. An enjoyable project.
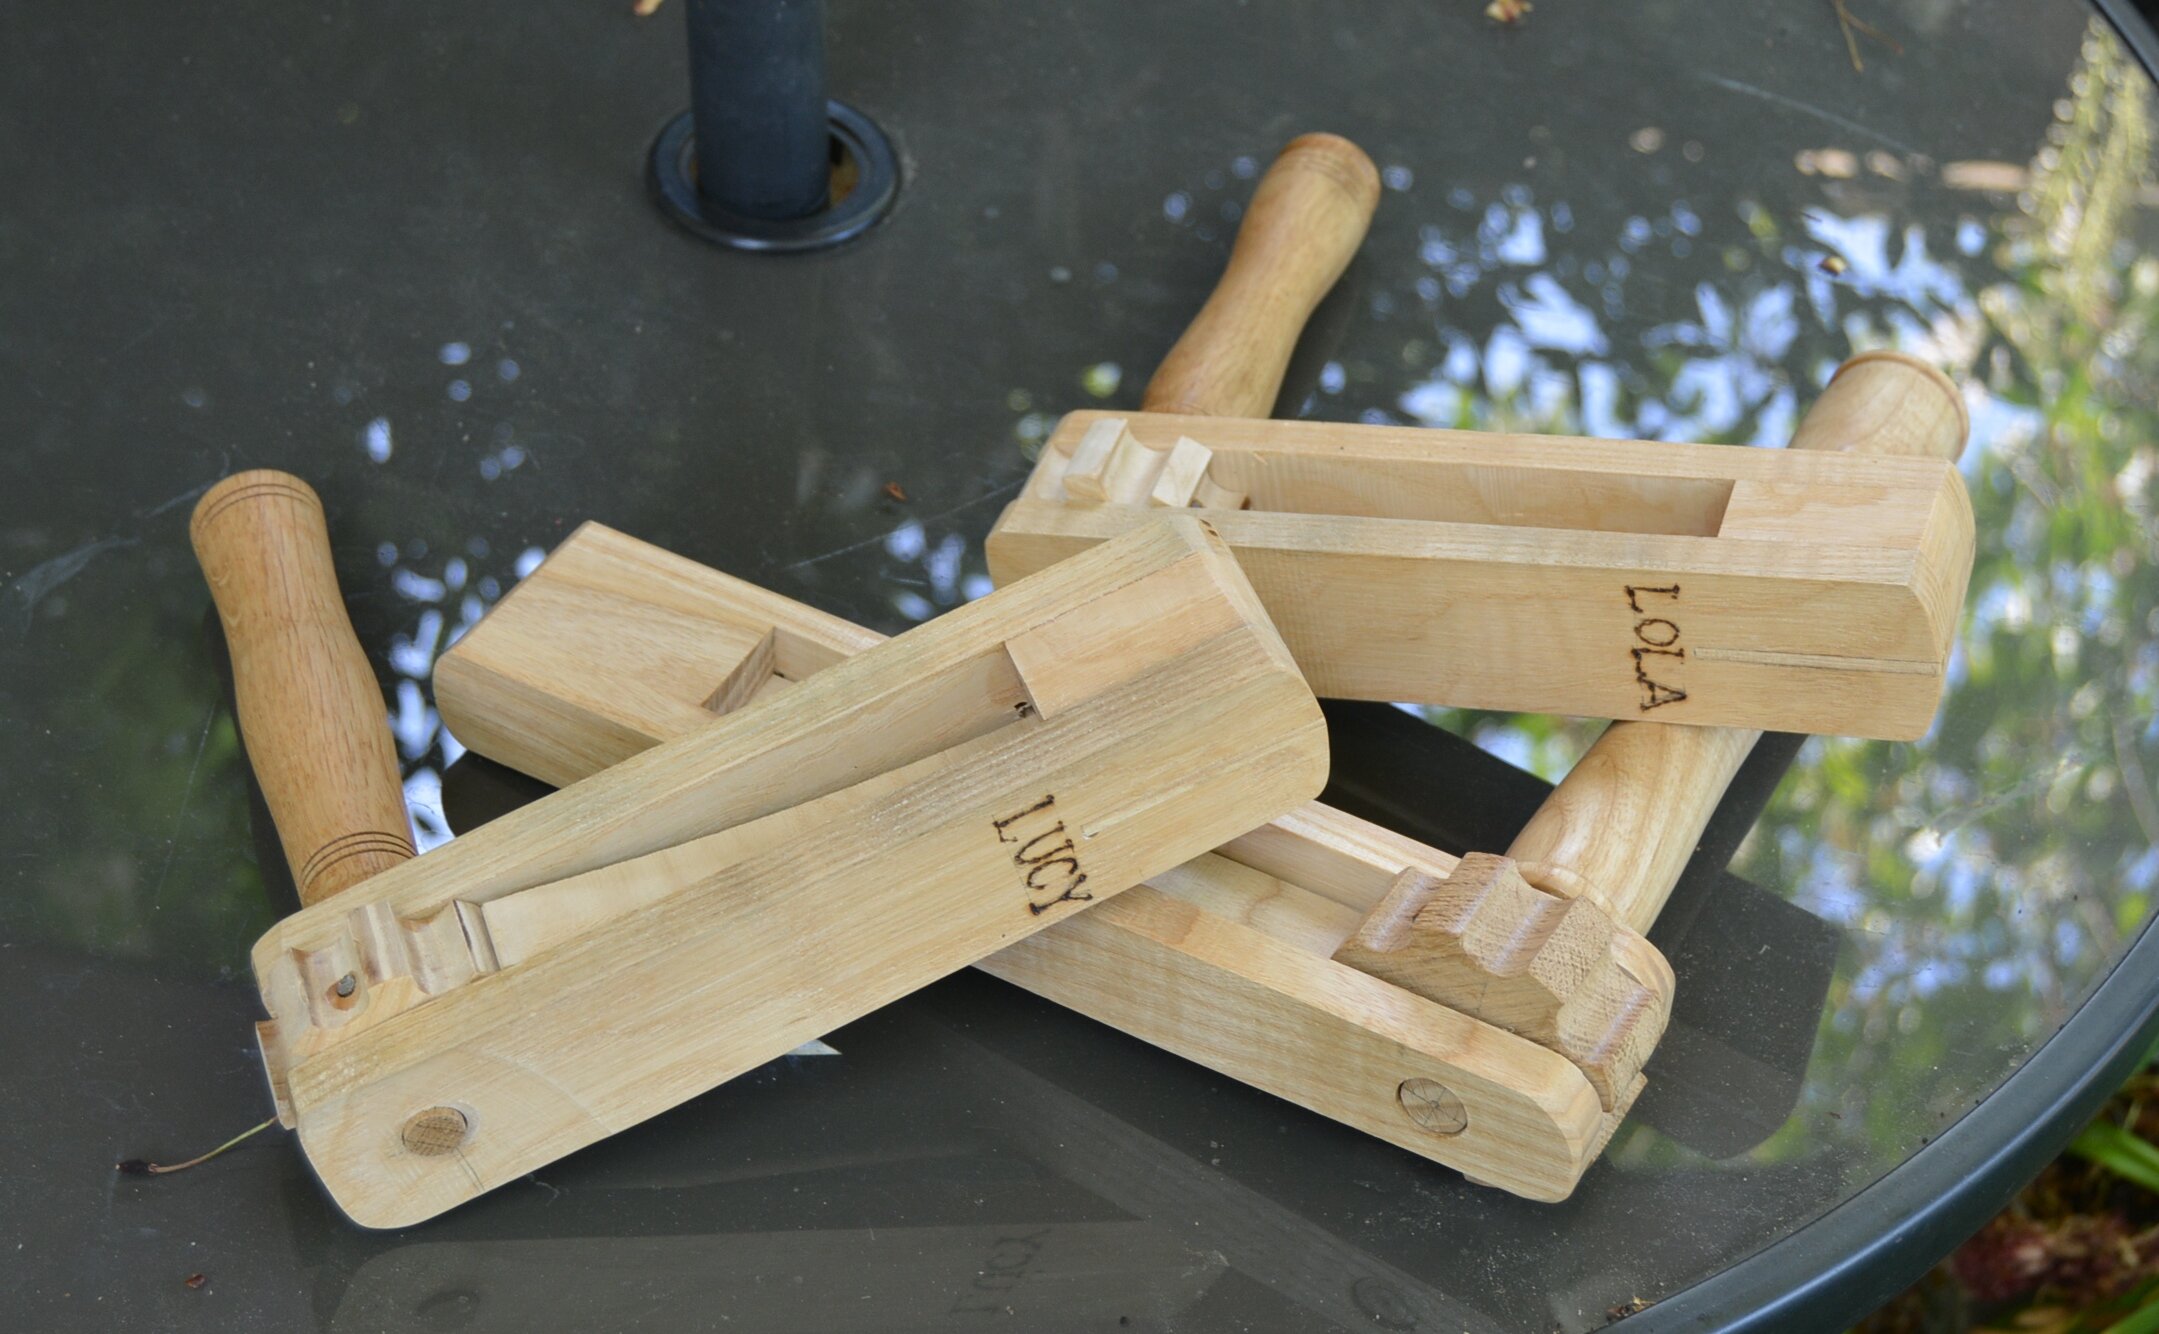
I was intrigued about how Barry made the cog and asked how he went about making it;
The cog starts as a 100mm square with the cog finished circle size drawn thereon, eight segments are marked on the circumference (say 16mm) and these plus centre hole for spindle are drilled out.
Then on the band-saw the material outside the original circle is removed leaving the teeth which are then carefully cleaned up on the lathe by holding on a jam-chuck and using a sharp tool. Alternatively they could be finished against a sanding disc.
Ted Higgs has been very busy making a mid-sleeper bed for his granddaughter and has just reached the spraying stage.
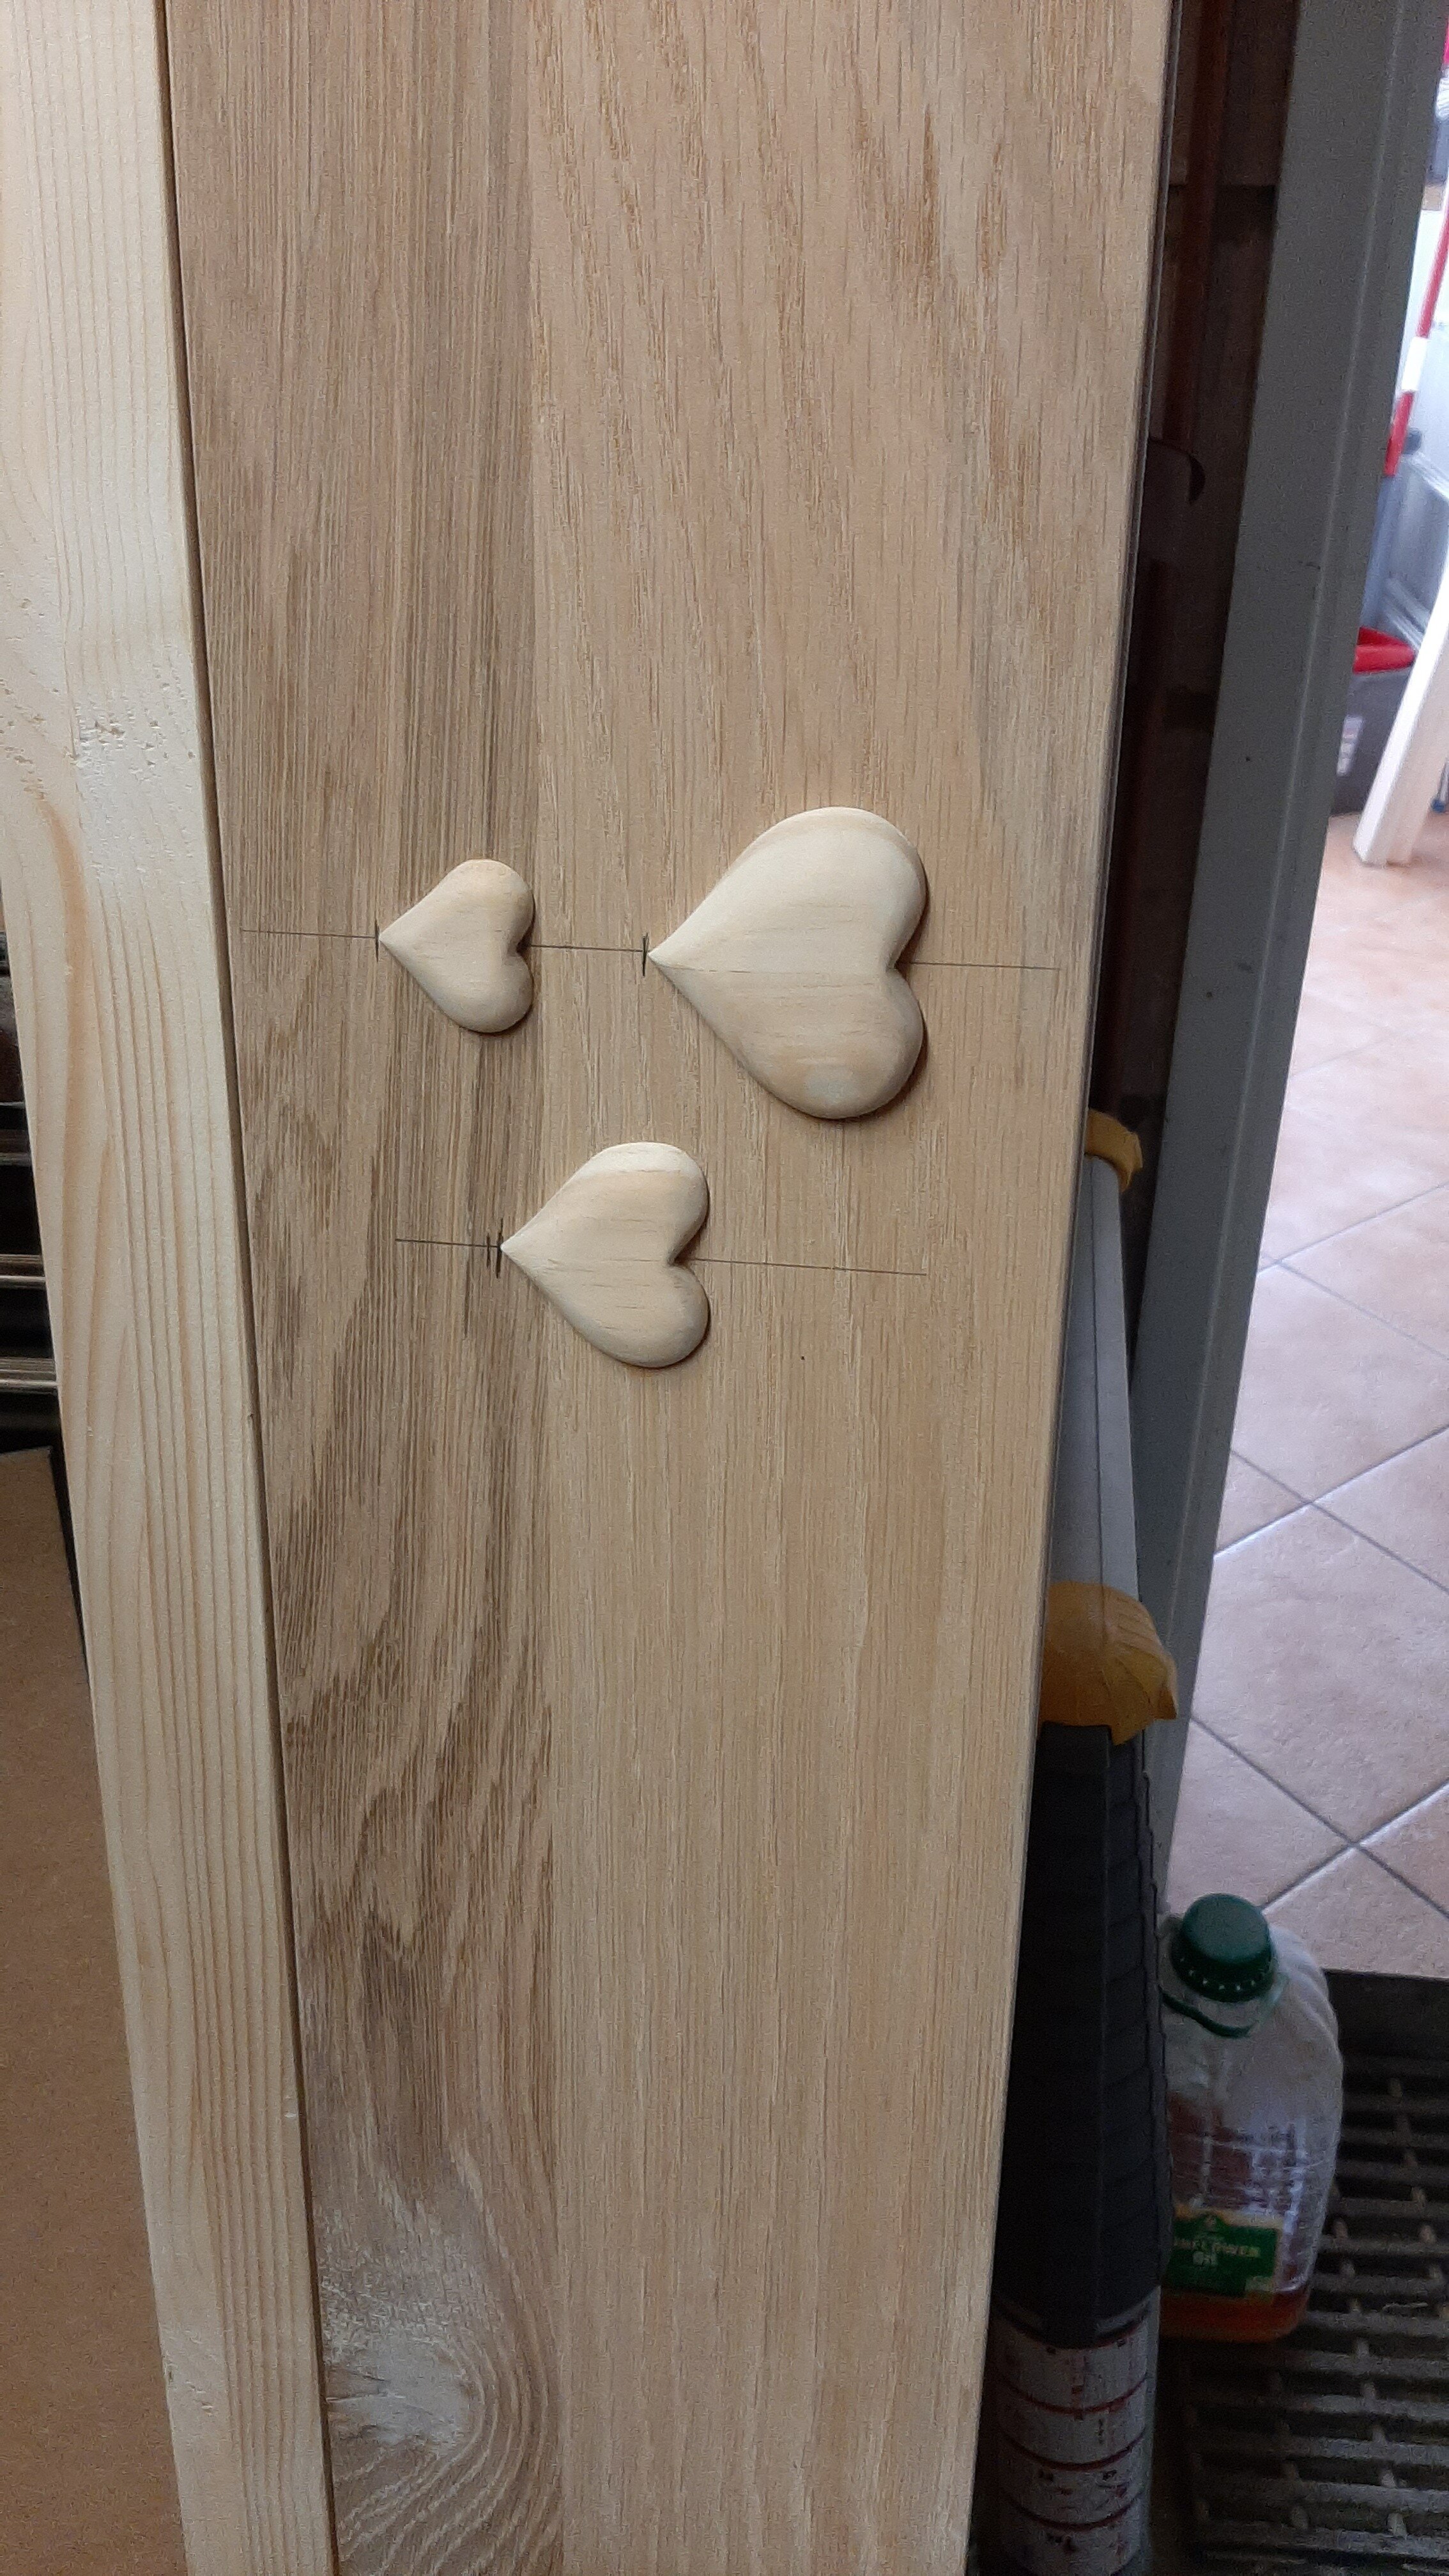
He made some hearts in Intarsia style by cutting them on the fretsaw and then rough sanding to shape on the sanding disk and then hand sanding to finish. That was a first time Ted had given that a try. There is a lovely contrast between the heart wood and the sapwood which gives the hearts another dimension and contrasts between the the base wood.
What has this got to do with turning?
Well he can’t get to the lathe otherwise!
Update (22nd May)
Ted has now complete the bed and it’s now in situ. Needless to say, Ted’s granddaughter was enamoured with. The only problem now is that his grandson wants one!


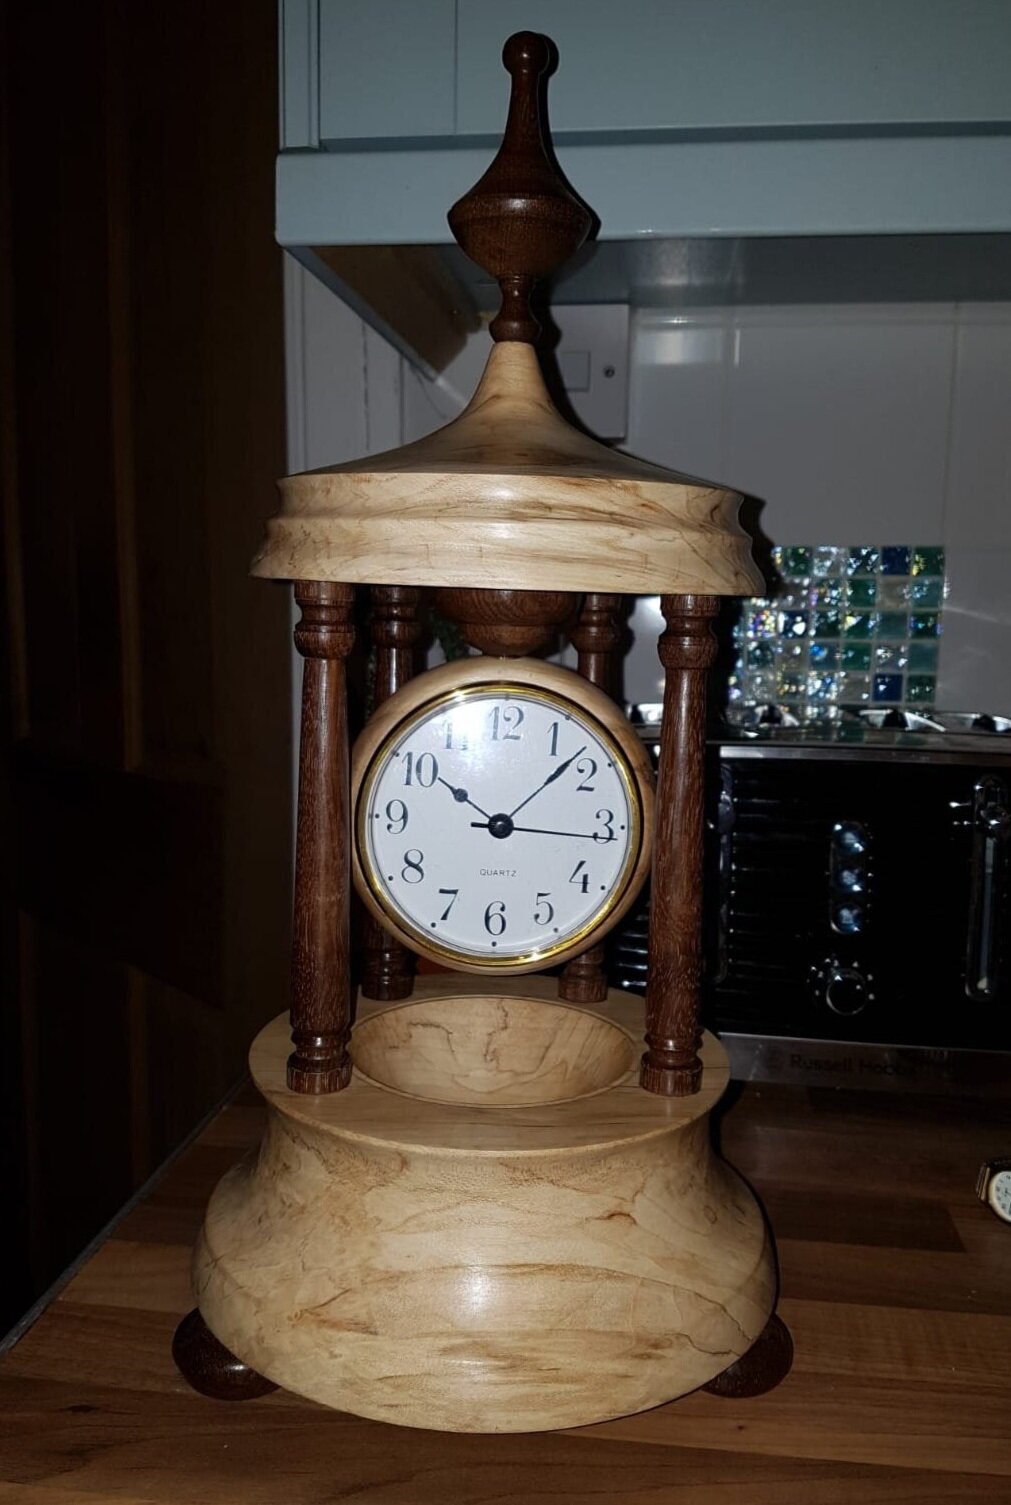
Clive Dunmow has produced two fantastic pieces, the oak which is the feature has been reclaimed. The figure for the oak is outstanding and brings the pieces to life, and it is testament to Clive’s skill that all aspects of the pieces have been well balanced. Note the echo of the figure between top and bottom pieces on the larger clock.


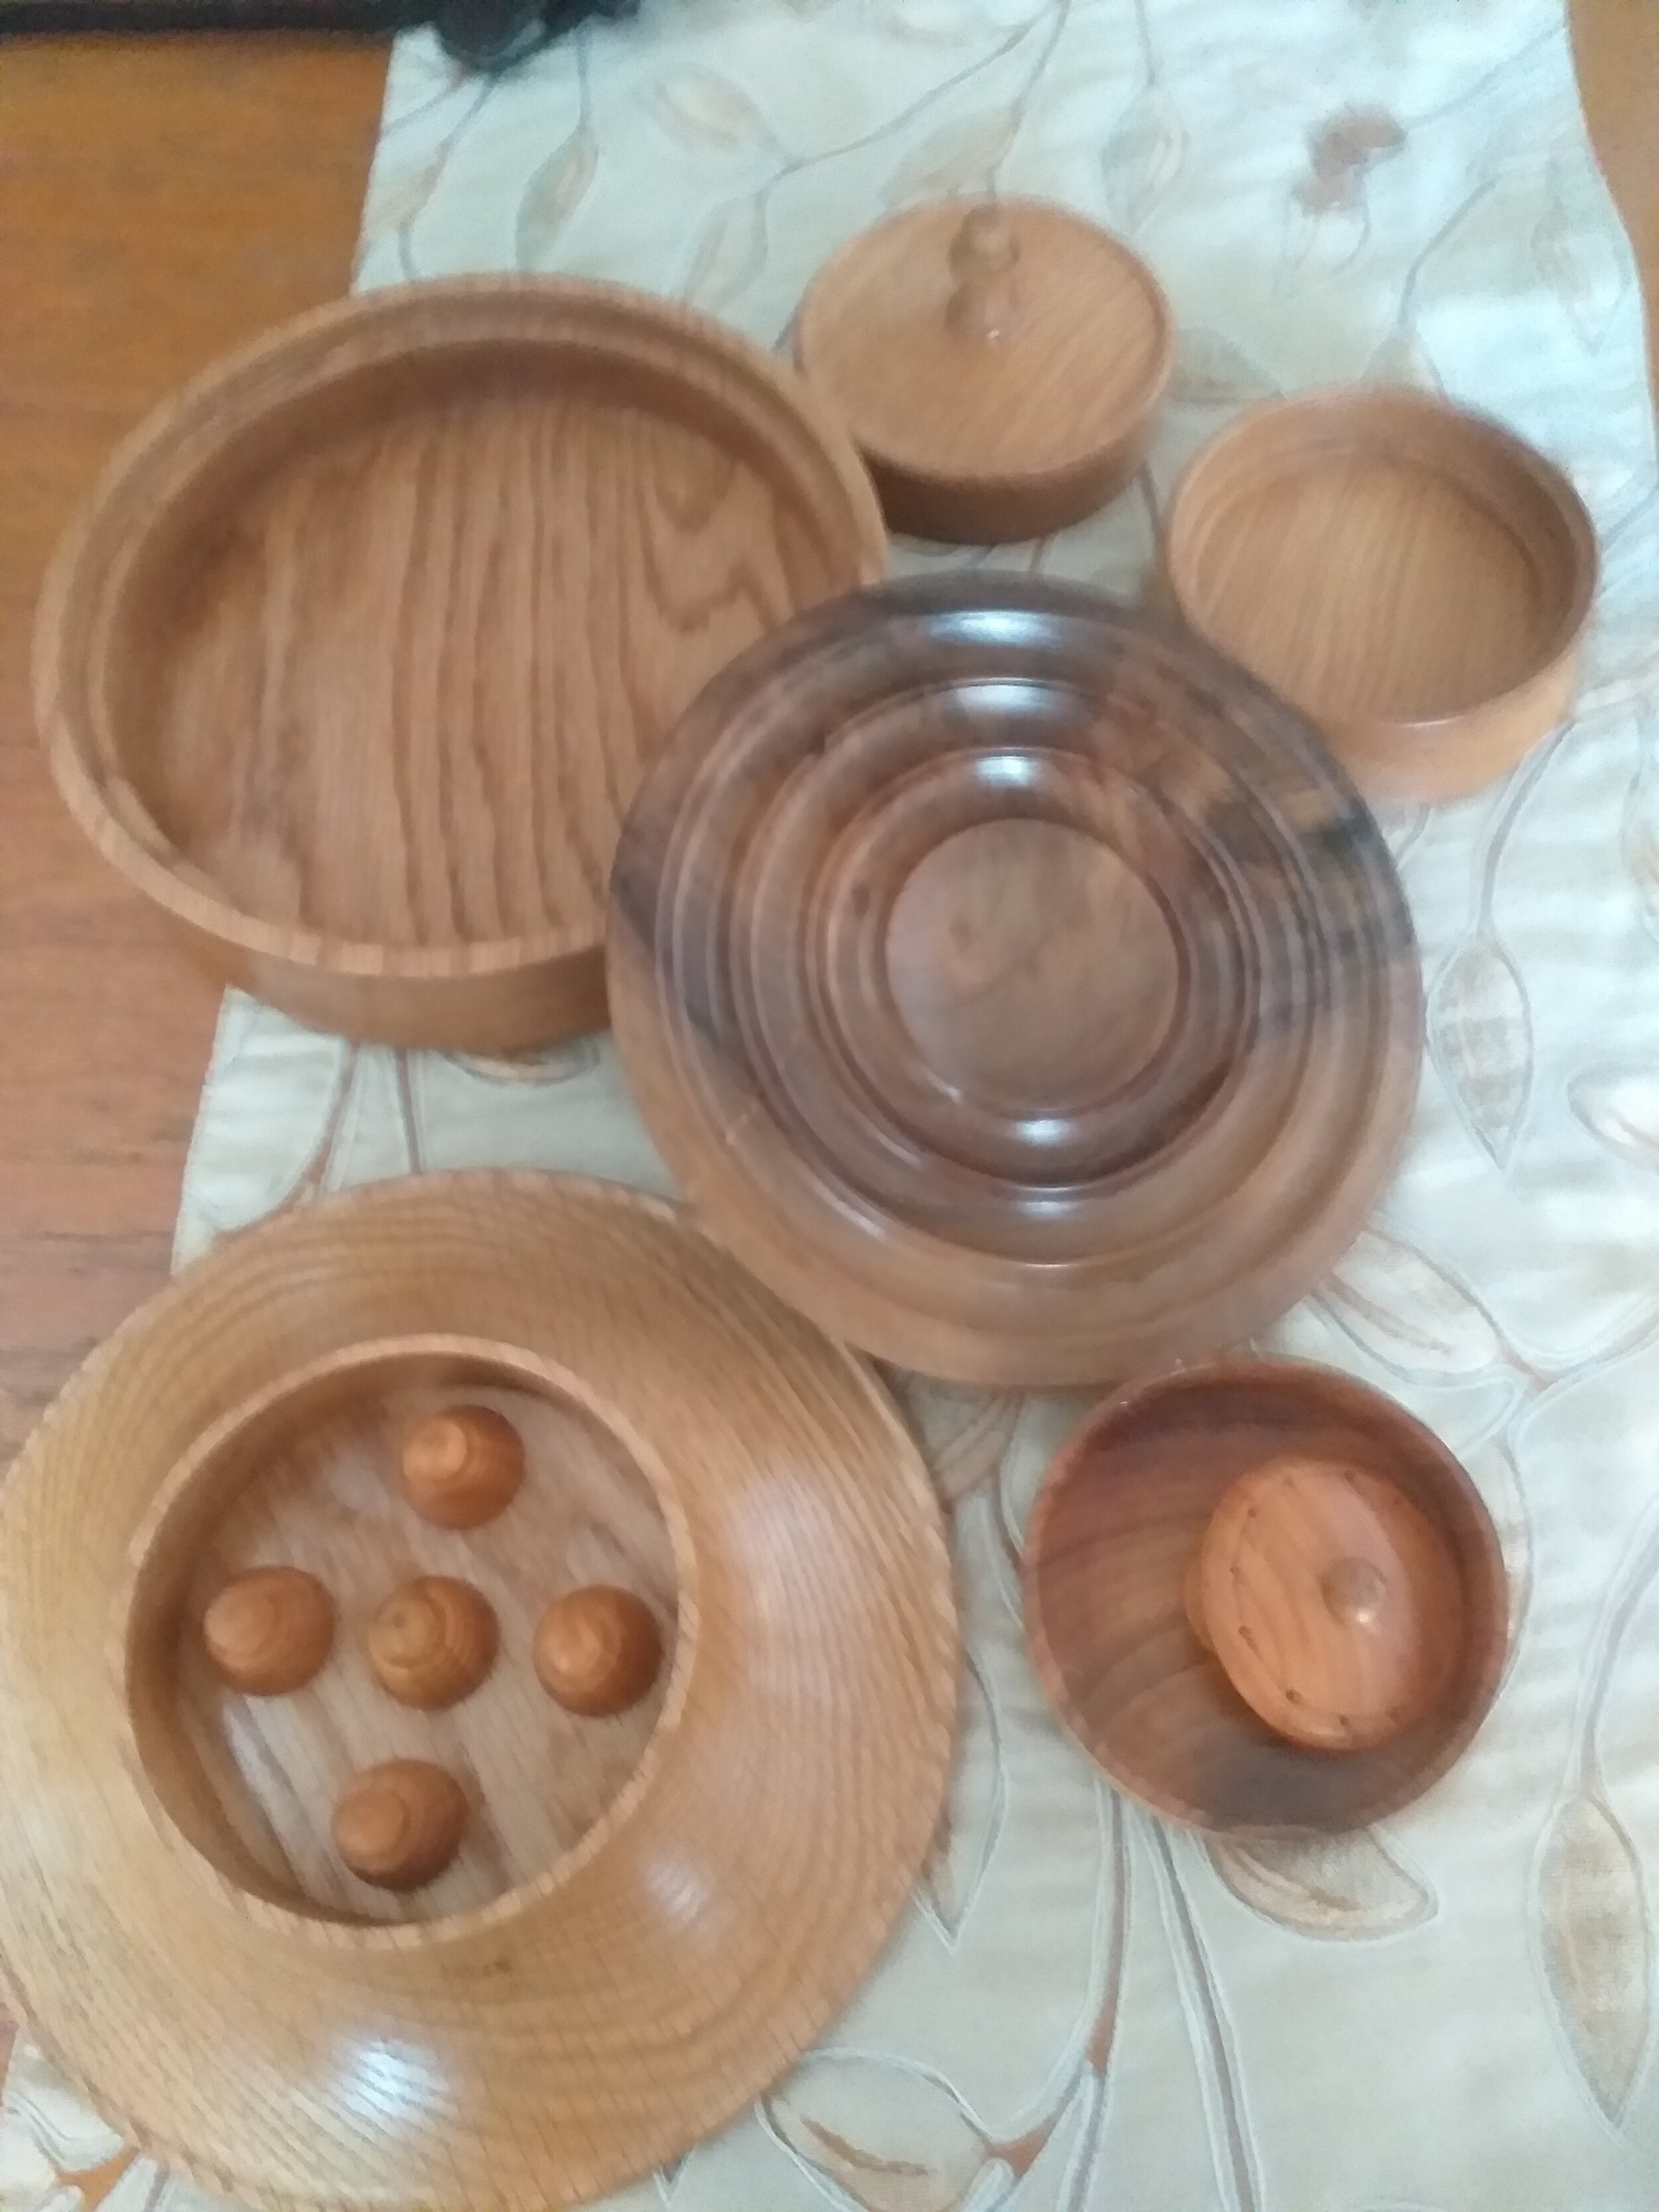

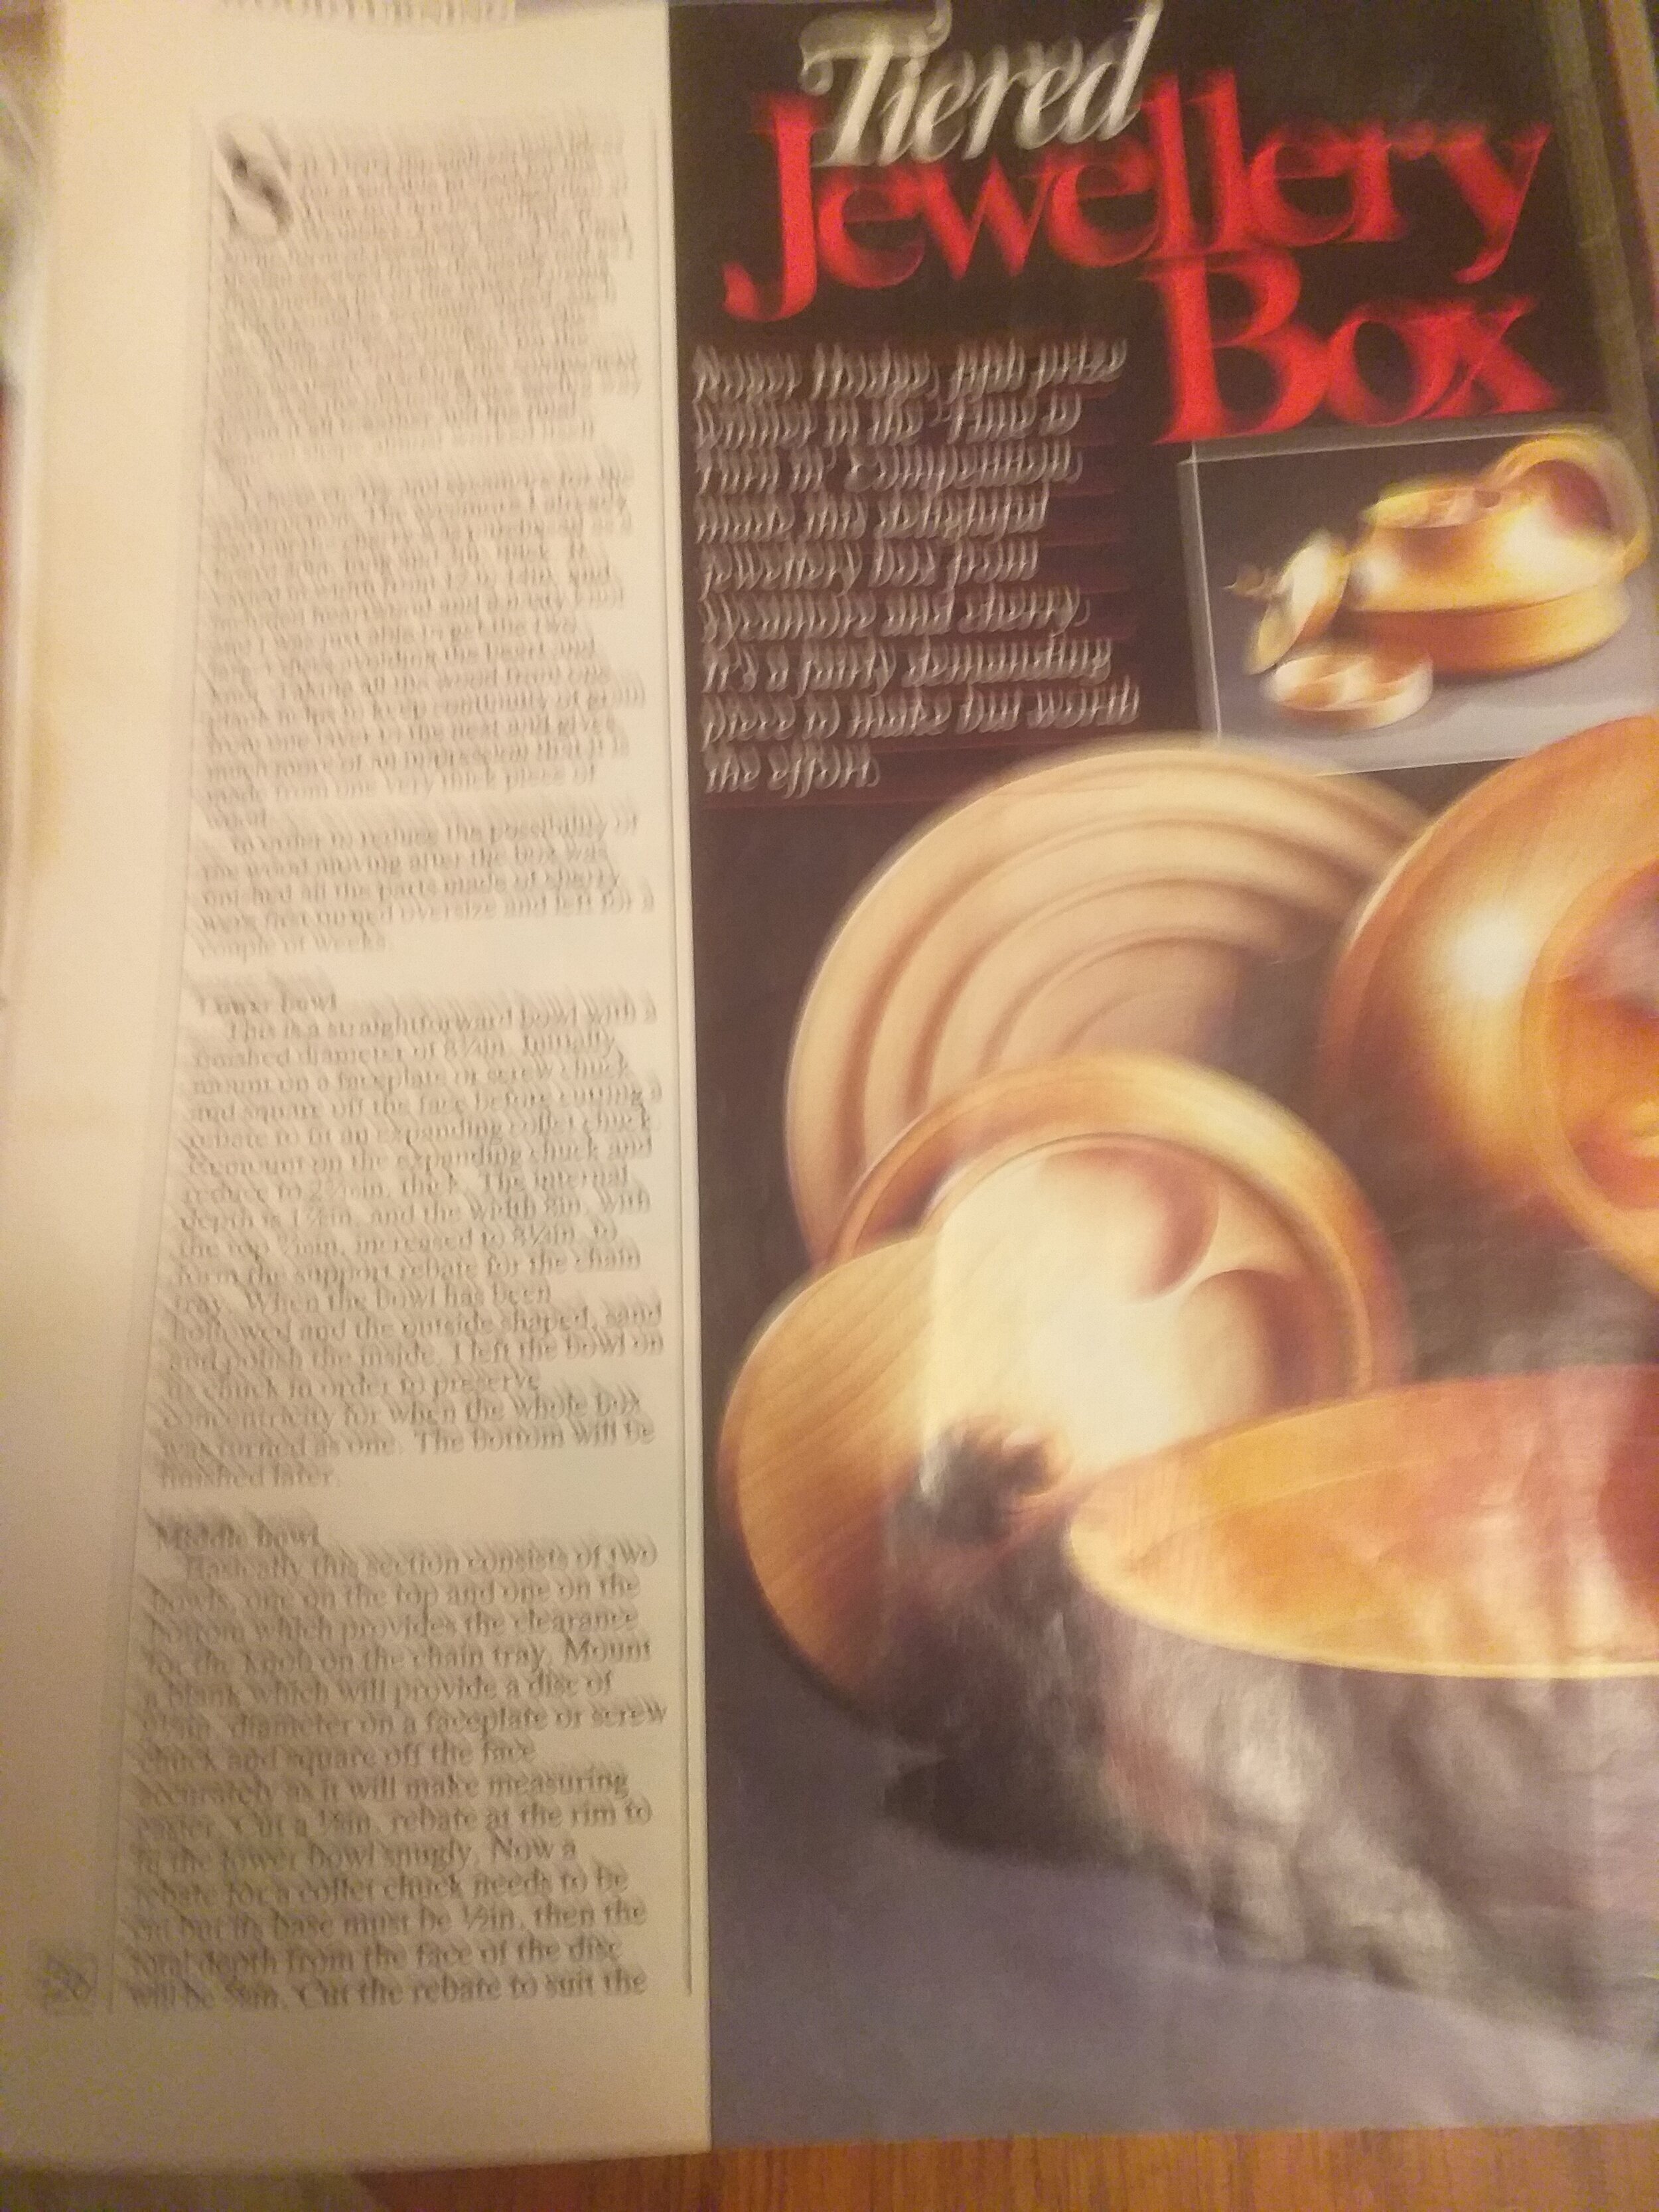
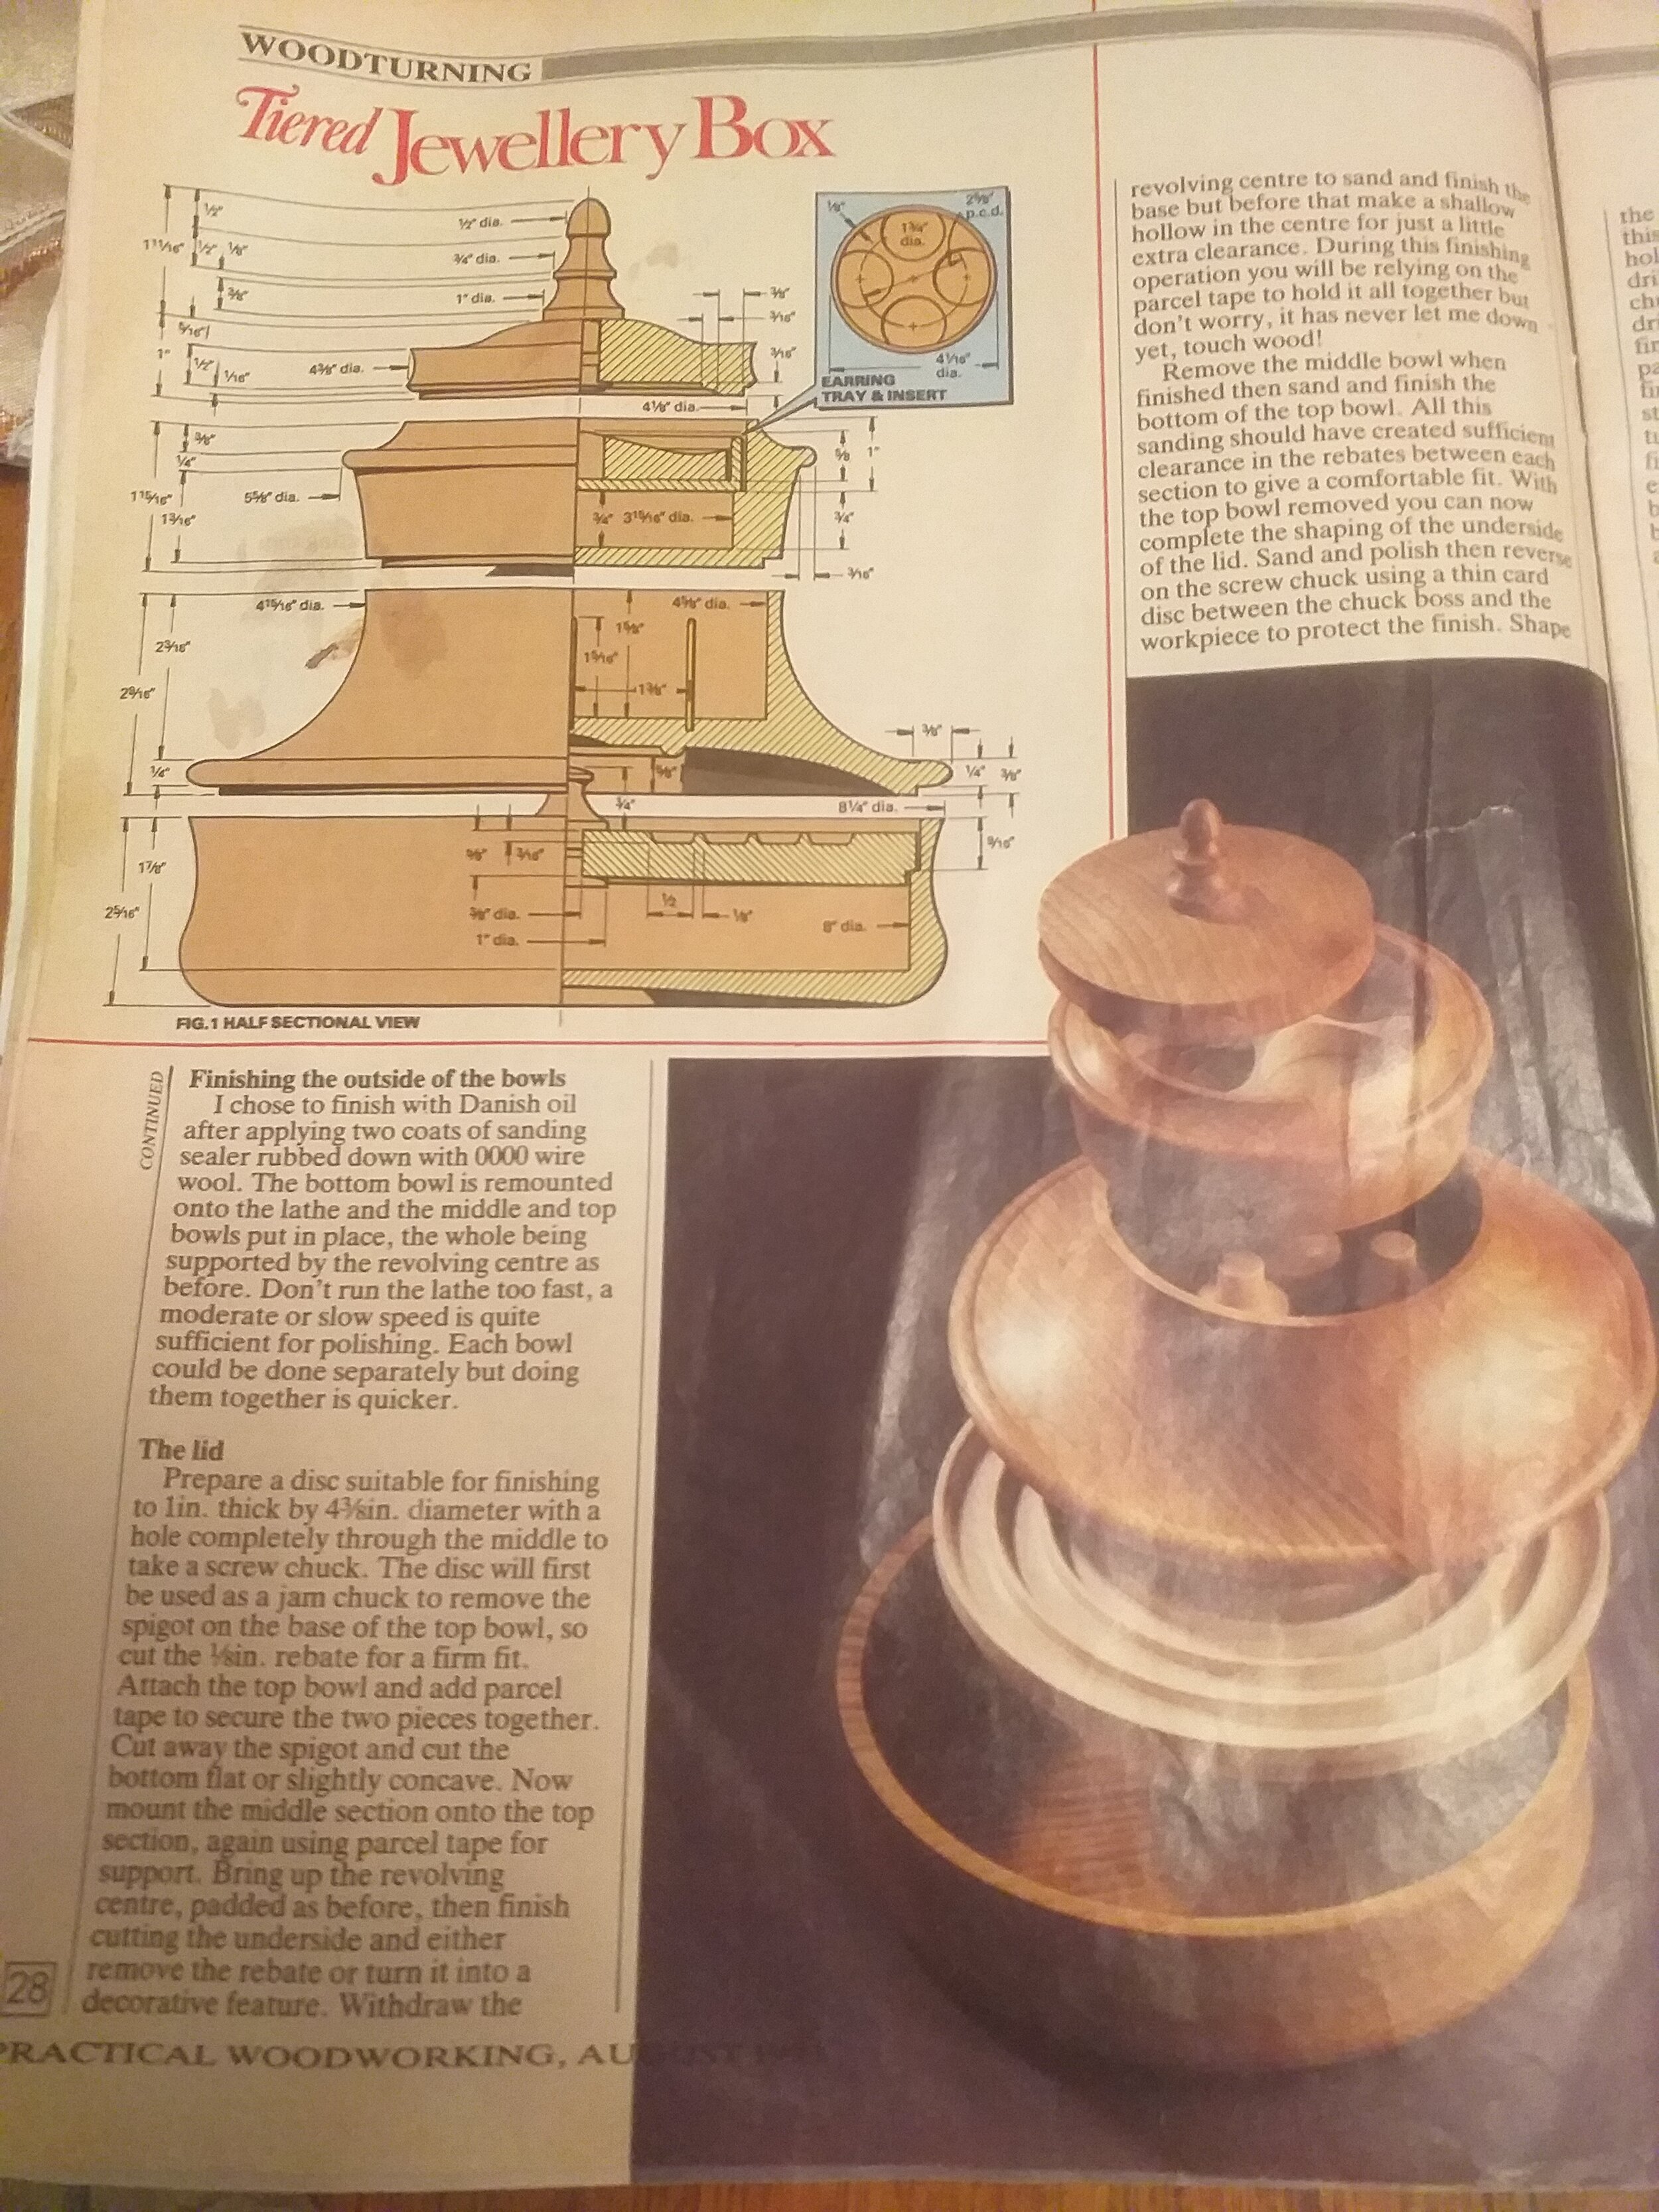


Norman Christensen has been busy in the workshop and has produced this fantastic three tiered jewellery box. He had been planning to attempt to make the box for many years, after spotting it in a 1993 woodworking mag. It is made from European oak & cherry. You will see that Norman has made few alterations to the earring & ring internal parts. It’s great to see that a 27 year old magazine still being used today; Norman kindly took a few photos from the magazine for us. Perhaps it’s time for us to dig out our archive of old book and magazines and see what treasures are in there?!
April 2020
Brian Partridge has delivered us a piece of his work, showing a great deal of skill for this small, 7cm posy pot, all made from one piece of wood. The base of the pot is a perfect circle, where the body takes more of an oval shape in both planes.
Brian made this as a trial for a larger version of the pot which he will look to make out of yew.
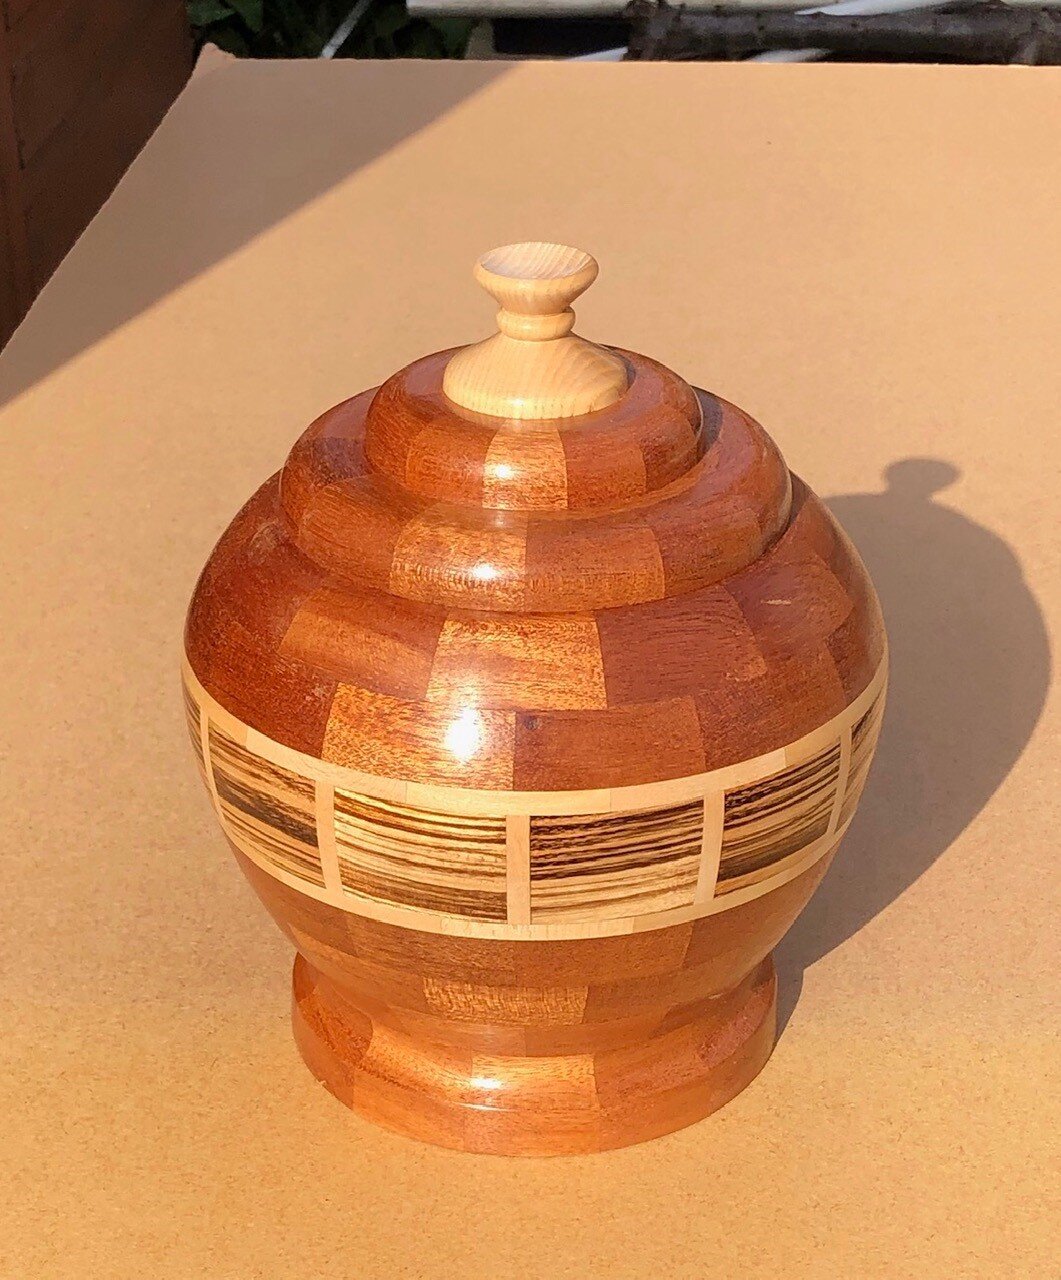

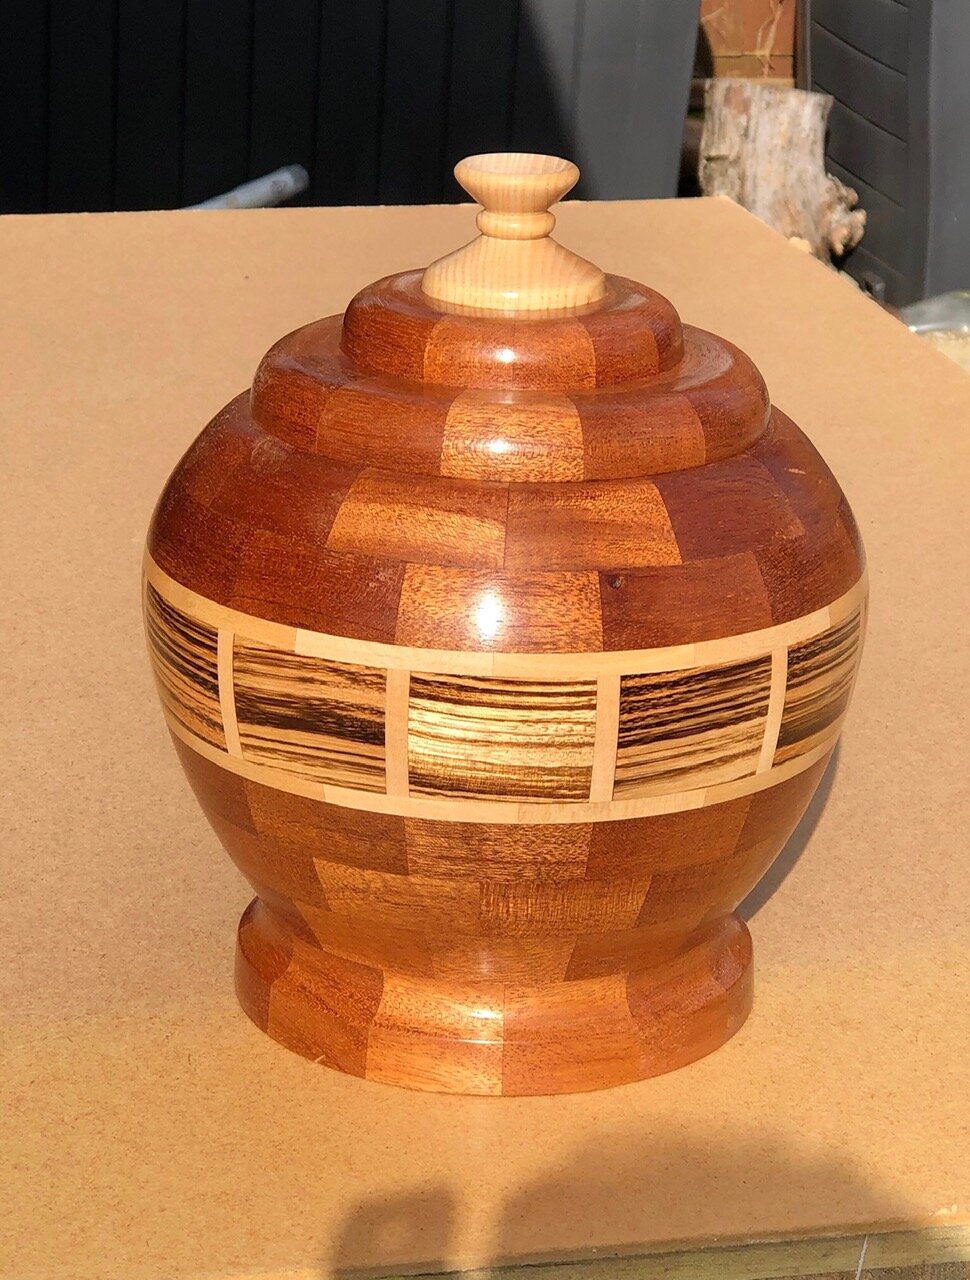
Mic Brown of http://www.marmic-manor-crafts.co.uk/ treated us to another one of his creations that he’s been recently working on. This is a Mahogany lidded vase, with tulipwood and zebrano in the central feature ring, finished with an ash nob on the lid. The piece stands at 10 inches high with a diameter of 8 inches. In total the piece is 157 segments, and it goes to show the effective contrasts between the different pieces of mahogany, where the lighter sections of the mahogany are vertically aligned giving another dimension to the vase.
February 2020
Mic Brown of Marmic Manor Crafts always brings his delightful creations to our sessions, showing us his unique embodied and turned pieces. He is an outstanding turner, making pieces that are highly detailed. I’d strongly encourage you to look through Mick, and his wife’s Marion’s website - http://www.marmic-manor-crafts.co.uk/

Bernie Mason brought this piece in on February’s session. Bernie told me that this was his second segmented piece that he’s created, and it looks as if he’s been creating these for years. This piece was made of 144 pieces; Bernie tells me that each ring has 12 pieces and each block had a 30 degree angle in it to make a perfect circle. The eagle eyed amongst you will note that there are 13 ‘level’ to this piece, as the bottom of the vase is a solid bit of wood which Bernie added the layers to.